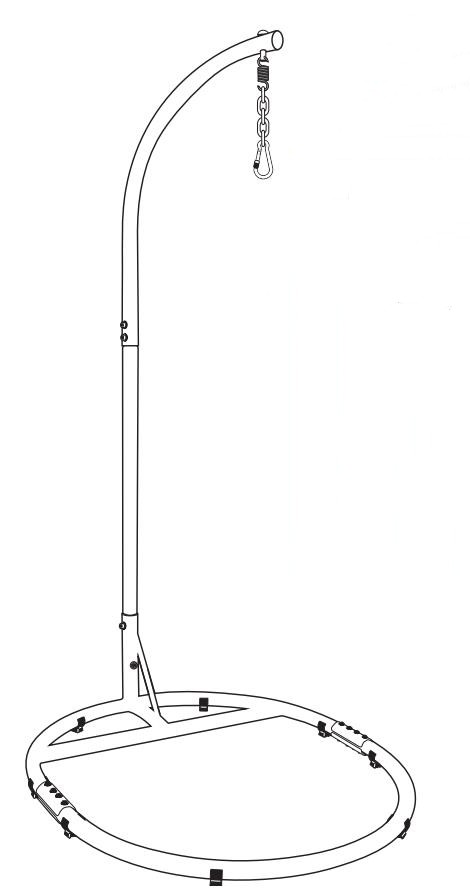
Egg Round Base Metal Chair Stand Installation Guide
Read all assembly and care instructions carefully before using this product.
Save these instructions for future reference.
Select a smooth, level surface to place the egg chair stand.
Assemble components on a soft, clean surface to avoid scratching/damaging the finish
|
|
Frame |
Pictures |
QTY |
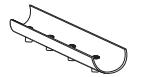
| A |
Base Back |
 |
1 |
| B |
Base Front |
 |
1 |
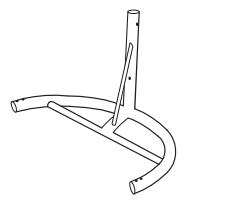
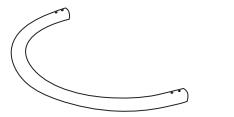
| C |
Straight Pole |
 |
1 |
| D |
Curved Pole |
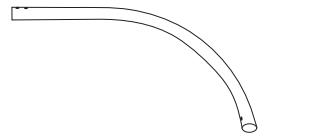 |
1 |
| E |
Top Base Connector |
 |
2 |
| F |
Bottom Base Connector |
 |
2 |
|
|
Hardware |
Pictures | QTY |
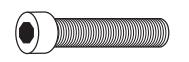
| G |
M6 Bolt |
 |
8 |
| H |
M6 Washer |
 |
8 |
| I |
Bolt Cap |
 |
8 |
| J |
Foot |
 |
8 |
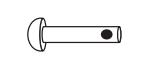
| K |
10 x 55mm Bolt |
 |
2 |
| L |
M10 Washer |
 |
8 |
| M |
10 x 60mm Bolt |
|
2 |
| N |
Lock Nut |
 |
4 |
| O |
Hex Nut Cap |
 |
4 |
|
|
Hanging Hardware |
Pictures | QTY |
| P |
Pin |
 |
1 |
| Q |
Extension Spring |
 |
1 |
| R |
Carabiner
with Chain |
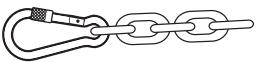 |
1 |
|
|
Tools (included) |
Picture | QTY |
| X |
Small Hex Key |
 |
1 |
| Y |
Large Hex Key |
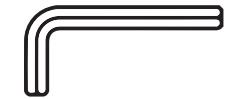 |
1 |
| Z |
Spanner |
 |
1 |
Assembly Tip: Ensure all parts and hardware align correctly before fully tightening the lock nuts.
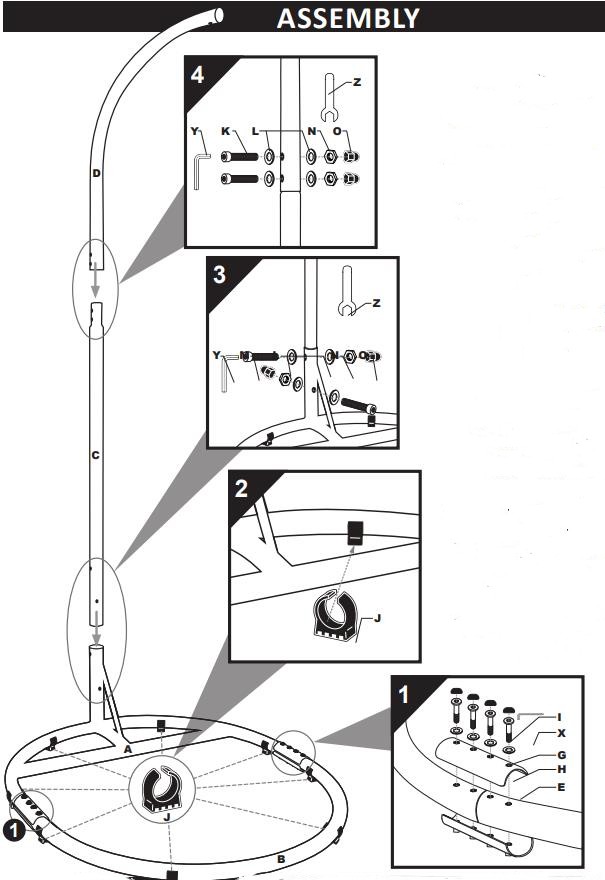
1. Align Base Back (A), Base Front(B), Top Base Connector (E), and Bottom Base Connector (F). Secure base parts using Bolt (G) and Washer (H). Tighten the hardware using the Small Hex Key (X). Place Bolt Cap (I) on top of the bolts.
2. Carefully snap Foot (J) evenly onto the stand base, as shown.
3. Slide Straight Pole (C) into Base Back (A) and align the holes. Secure the pole using Bolt (M), Washer (L), and Lock Nut (N). Tighten the hardware using Large Hex Key (Y) and Spanner (Z). Place Hex Nut Cap (O) over the lock nut.
4. Slide Curved Pole (D) onto Straight Pole (C) and align the holes. Secure the poles using Bolt (K), Washer (L), and Lock Nut (N). Tighten the hardware using Large Hex Key (Y) and Spanner (Z). Place Hex Nut Cap (O) over the lock nut.
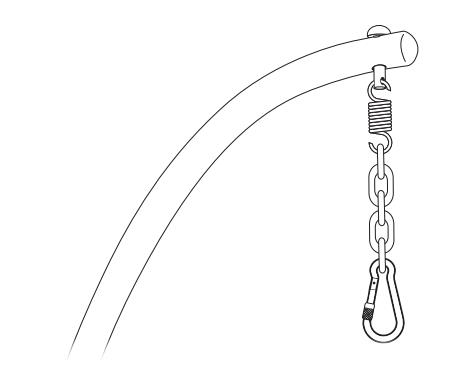
Installing Hanging Hardware
Place Pin (P) into Curved Pole (D). Insert Extension Spring (Q) through the bottom of Pin (P). Hang the chain (R) on Extension Spring (Q).
USE & CARE
SAFE USE: Do not use this chair for swinging, bouncing, jumping, twisting, or other excessive movements; doing so may cause serious injury, including, but not limited to, the stand tipping over.
CHILDREN: Supervise children at all times. Do not allow children to play on or sleep in hanging chairs. Chair not included.
INSPECTION: Ensure the stand is assembled correctly and the hardware is securely tightened before each use.
CLEANING: Use a soft cloth, warm water and mild detergent to wipe down the stand if necessary. Dry the stand after cleaning to prevent rust.
SCRATCHES: The powder coating on the stand is tough and durable but, even under normal use, some scratching is inevitable. To avoid excessive rust, wipe these areas as needed to remove moisture.
STORAGE: Store the stand indoors when not in use. Cool, dry locations are recommended to prevent damage and rust that may result from exposure to moisture.
TROUBLESHOOTING
If the stand feels unstable, make sure it is on a level surface and the feet are correctly and evenly distributed.
If the stand is making noise when in use, check to make sure all hardware is fully tightened.
SAFETY STATEMENTS & WARNINGS
• Do not exceed the weight capacity: 265 lbs
• Egg Chair Stand is intended to be used by one person at a time.
• This chair stand must be used with all provided parts. Install all parts in accordance with the assembly instructions.
• Ensure all hardware is securely installed and tightened before each use.
• Always inspect the stand and hardware for damage before each use.
• Do not allow children to use this product without adult supervision.
• This stand was designed for sitting calmly in an egg chair. Chair not included.
• Do not swing, bounce, jump, twist, or spin in the chair (not included) when using this egg chair stand.
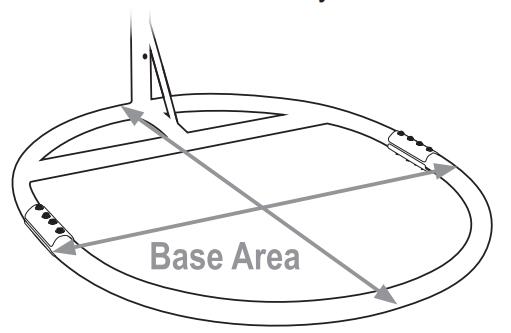
• When in use, the chair (not included) should remain inside the base area at all times. A diagram of the base area is shown on the right.