10 Ft. W x 10 Ft Iron Patio Gazebo Installation Guide
Caution : You must read this before you proceed. Read all instructions before assembling and using this product
1. Select ideal location. Set out all parts on a clear and level surface prior to assembly. Ideally, the Gazebo should be set up in the desired location to avoid moving it after assembly.
2. Team Work. We recommend 4-5 adults and it may require 3 to 4 hours to fully assemble the Gazebo. If possible, please use safety ladders.
3. Use caution. During the entire assembly process, especially when lifting heavy or large parts or using ladders, pay attention to safety. No one other than those assistants should be allowed in the work area.
4. Check all available parts. Before assembling your Gazebo Frame, make sure that you have all the parts described in the Parts List.
5. Ensure that ALL BOLTS are fully and securely bolted in before you proceed to attach the Canopies.
6. Keep children away. Children shouldn’t be allowed in the work area. Do not let them handle parts and tools. Do not allow children to climb the Gazebo.
7. It is recommended that the canopy, sidewall and mosquito netting be removed during strong windy conditions.
Label
Picture
Description
QTY
A

Crown Center Connector
1
B

Long Top Bar
4
B1

Connection Tube
4
C

Short Top Bar
4
D1

Crossbar
4
D2

Crossbar
4
E
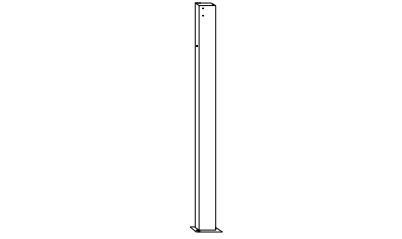
Main Pillar
4
F1

T Shape Connector
4
F2
U Shape Connector
4
G

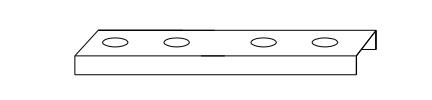
Sliding Rail
16
H

Connection Piece
8
N

Vent Canopy
1
O
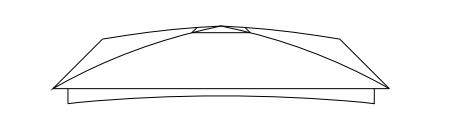
Canopy
1
P
Curtain
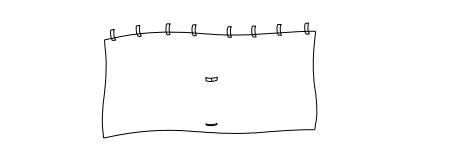
4
Q
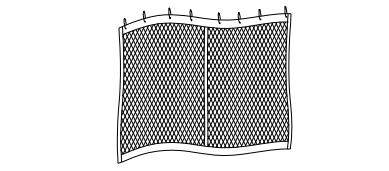
Mosquito Netting
4
Label
Picture
Description
QTY
S
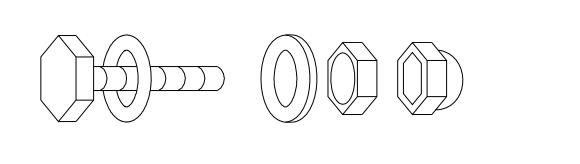
Bolt(M6*72mm)\Flat
Washer\ Nut\ Plastic Nut
Cap
18
T

Bolt(M6*15mm)\Flat
Washer
40
X
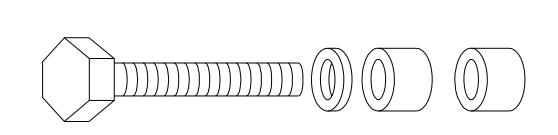
Bolt(M6*57mm)\Flat
Washer\plastic gasket
9
Z

Wrench
4
U

Plastic Ring
78
V

Stake
8
Installation steps
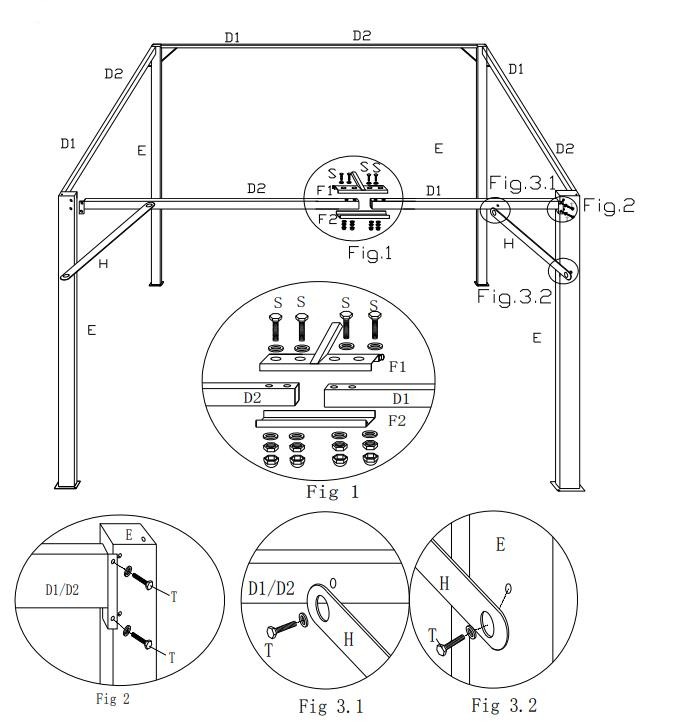
Attach the U Shape Connector(F2) and T shape Connector(F1) to the Crossbars(D1, D2)
using Hardware(S) with Wrenches(Z). (See Fig. 1)
Please note the T shape Connector(F1) should be on top.
Attach the assembled Crossbar(D1, D2) to Post(E) using Hardware(T) with Wrenches(Z).
(See Fig. 2) Note the T Shape Connector(F1) should be angled inwards.
Attach the Connection Piece(H) to the Crossbar(D1, D2) and Post(E) using Hardware(T)
with Wrenches(Z). (See Fig. 3.1&3.2)
DO NOT OVERTIGHTEN BOLTS at this step.
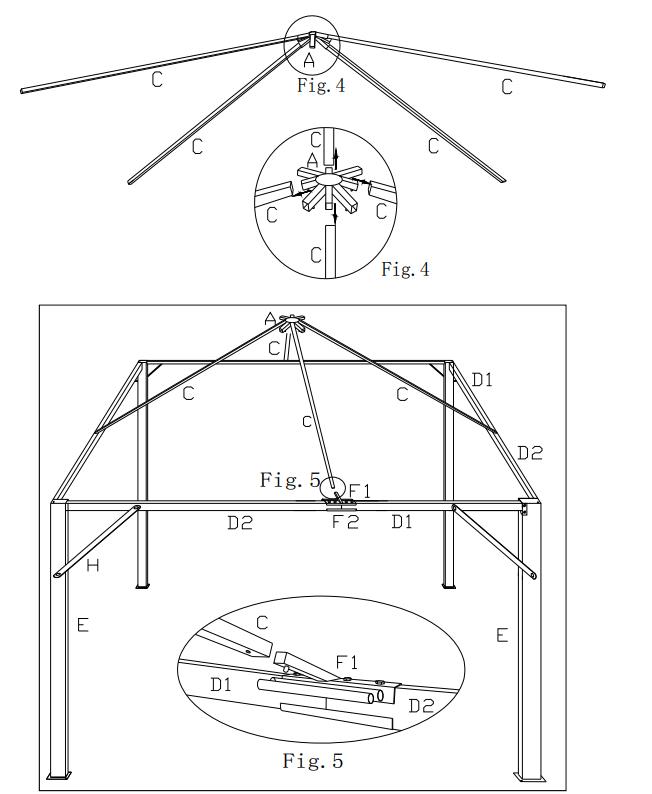
Attach each Short Top Bar(C) to Crown Center Connector(A) using the preattached snap
buttons. (See Fig.4)
Have 4 adults lift the assembled Short Top Bar(C) onto the assembled Gazebo frame.
Then, attach the other end of the Short Top Bar(C) to the T Shape Connector(F1) using
the preattached snap buttons. (See Fig. 5)
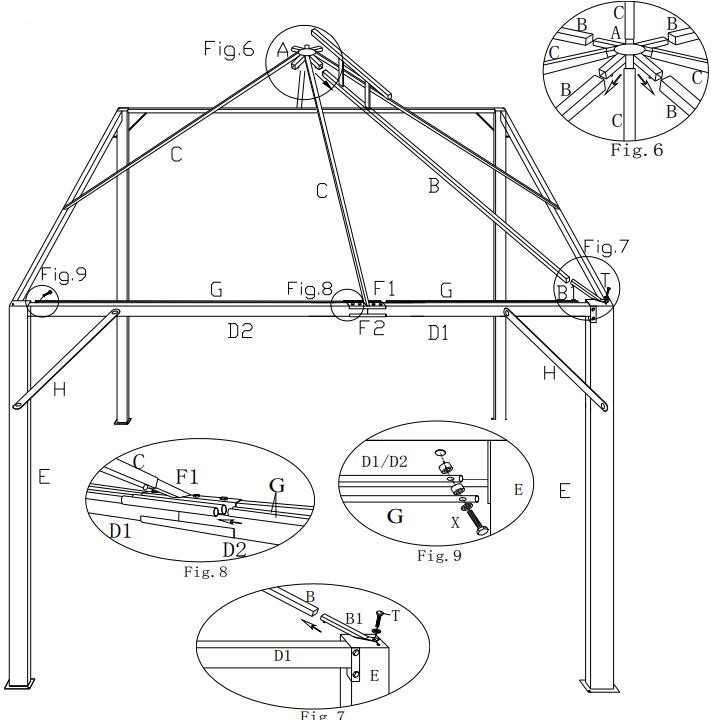
Attach the Long Top Bar(B) to the Center Connector(A) using the preattached snap buttons. (See Fig. 6)
Attach the other end of the Long Top Bar(B) to Connection Tube(B1) using the preattached snap
buttons.
Attach the Connection Tube(B1) to the top of the Post(E) using Hardware(T) with Wreches(Z). (See
Fig.7)
Insert one side of the Sliding Rail (G) into the T Shape Connector(F1) (See Fig. 8).
Fix the other end of the Sliding Rail (G) to the Cross Bar(D1, D2) using Hardware(X) with Wrenches(Z).
Please add plastic Gasket (X) between each two tubes. (See Fig. 9)
Repeat this step to affix other 3 Long Top Bar(B) up.
NOW PROCEED TO FULLY AND SECURELY TIGHTEN UP ALL BOLTS at every Pillar and Master
Beam and Crown and Corner Connector.
And Add Plastic Nut Caps on all nut ends to protect skin or clothing from getting snagged
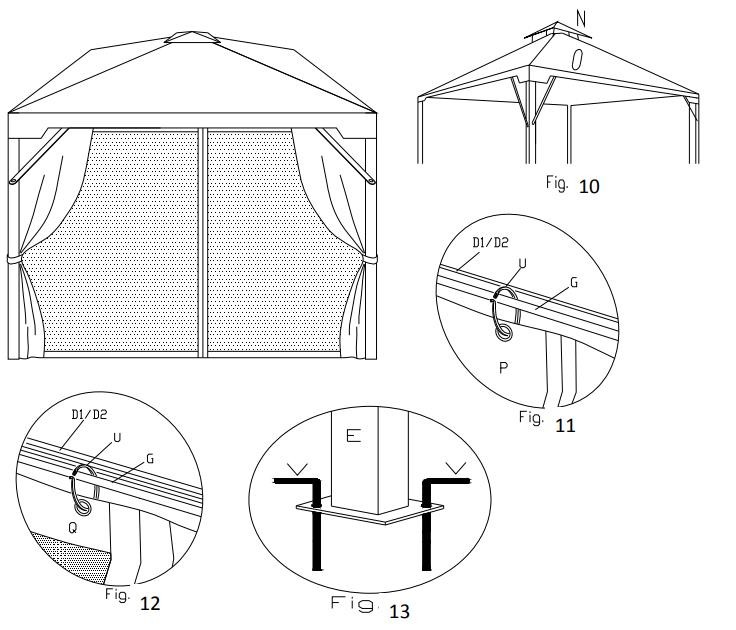
On the ground, curl and roll the Canopy and hoist onto the top of the gazebo frame. Place the Canopy(O) onto the frame of the Gazebo. At this stage, DO NOT UNFOLD and drape the Canopy. DO NOT secure the Canopy at this stage. Put the Vent Canopy (N) onto the frame, then securely attach the Canopy(O) to the Top Tube and the Cross Beams using the velcro strips. (See Fig.10) Now proceed to securely fasten the Canopy ( O ) into position. Hang the Curtain(P) onto the outside Sliding Rail (G) with the Plastic Rings(U) (See Fig.11). Hang the Mosquito Netting(Q) onto the inside Sliding Rail (G) with the Plastic Ring(U). (See Fig.12) Adjust the position of the Gazebo as desired. Affix the Gazebo to the ground by inserting the Stake(V) through the Post(E) bases. (See Fig.13) Your Gazebo is ready for use