10'x10' Flat Top Pergola Product Guides
For safety reasons, it is recommended that at least 2 people Similar to the pergola. Assembly of the pergola may take up to 90 minutes.
It is important to schedule enough time to complete the assembly. You should not leave the equipment unattended if it is not fully assembled, even if it has been secured to the ground. You should start the assembly.
No less than 6 feet from any permanent structure, such as a fence, garage house, overhanging tree branches, power lines, or clotheslines.
PARTS LIST
Description
Sketch
QTY
A1
Post

2 pcs
A1
Post

2 pcs
B1
Roof Tube Curved

2 pcs
B2
Roof Tube Curved

2 pcs
C1
Lintel

2 pcs
C2
Lintel

2 pcs
D1
Roof Tube

3 pcs
D2
Roof Tube

3 pcs
E1
Weight Bar

2 pcs
E2
Weight Bar

2 pcs
G
Connector Tube

2 pcs
H
Base Plate

4 pcs
K
Shade Fabric
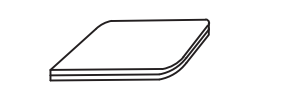
1 pcs
AA
Bolt
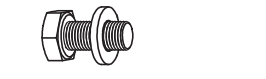
78 pcs
BB
Bolt
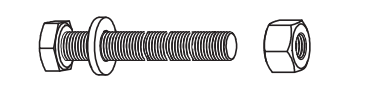
8 pcs
CC
Bolt
6 pcs
DD
Anchor
8 pcs
EE
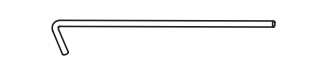
Wrench
2 pcs
Assembly
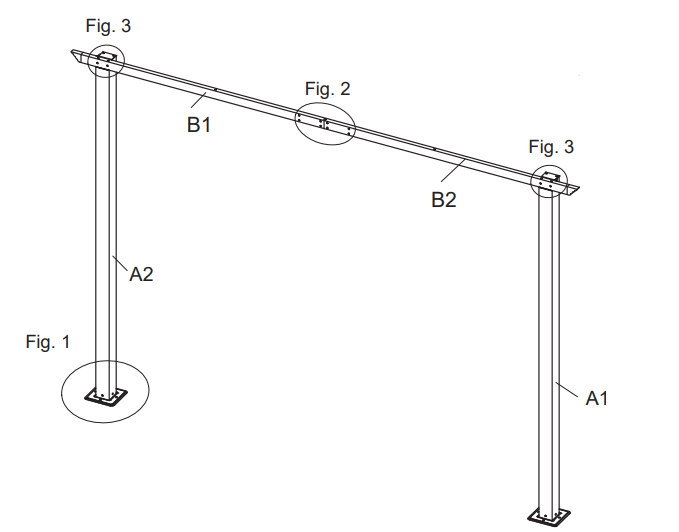
Note:
B1 and B2 are installed on the inside of
A1 and A2, if the direction is reversed, the
subsequent holes are not aligned.
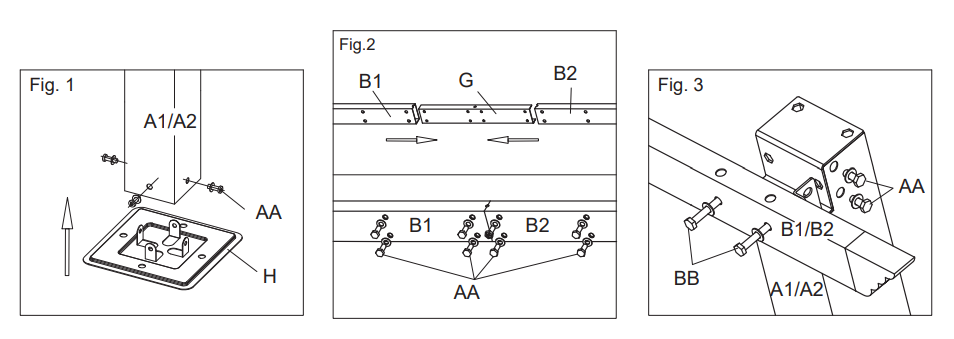
Step1:
Fig.1: Insert Post(A1) to Base Plate Cover (J), then using Bolt (AA) to connect Post (A1 & A2)
and Base Plate (H). Repeat each step for A1/A2.
Fig.2: Insert Connector Tube (F) to Roof Tube Curved (B1 & B2), make sure the holes are aligned.
Using Bolt (AA) to connect Connector Tube (F) and Roof Tube Curved (B1 & B2).
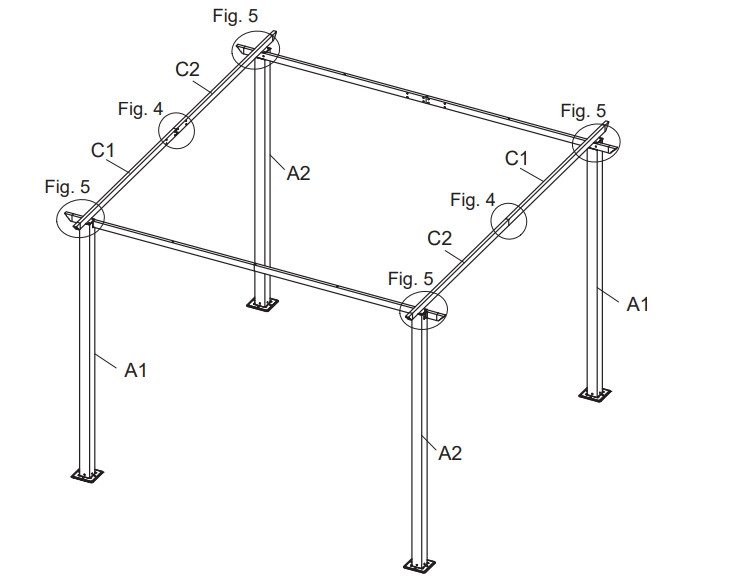
Fig.3: Using Bolt (AA) and Bolt (BB) to connect Roof Tube Curved (B2) and Post (A2), Using
Bolt (AA) and Bolt (BB) to connect Roof Tube Curved (B1) and Post (A1).
Step2:
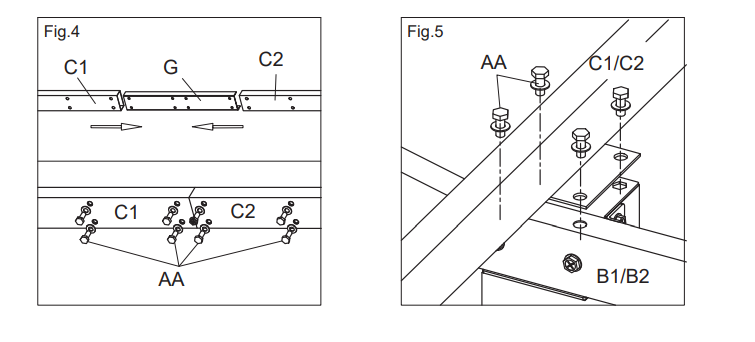
Fig.4: Insert Connector Tube (G) to Lintel (C1) and Lintel (C2), make sure the holes are aligned.
Then use Bolt (AA) to connect Lintel (C1), Lintel (C2) and Connector Tube (G).
Fig.5: Using Bolt (AA) to connect Lintel (C1) and Roof Tube Curved (B1). Using Bolt (AA)
to connect Lintel (C2) and Roof Tube Curved (B2).
Step3:
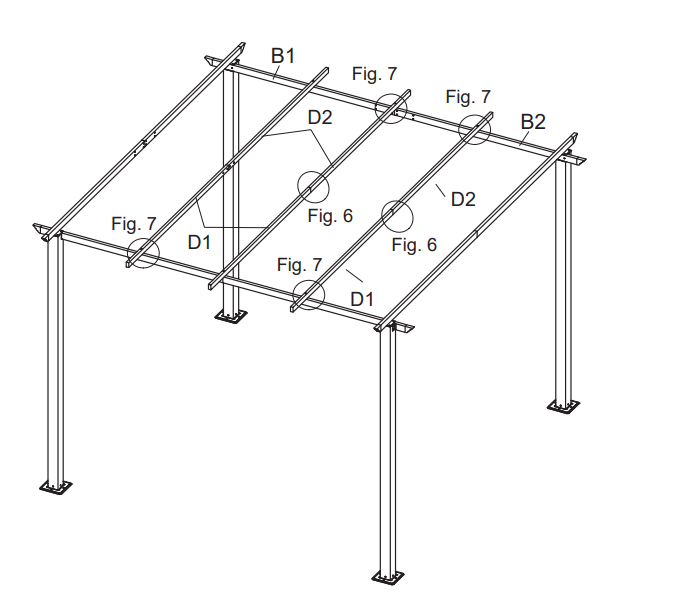
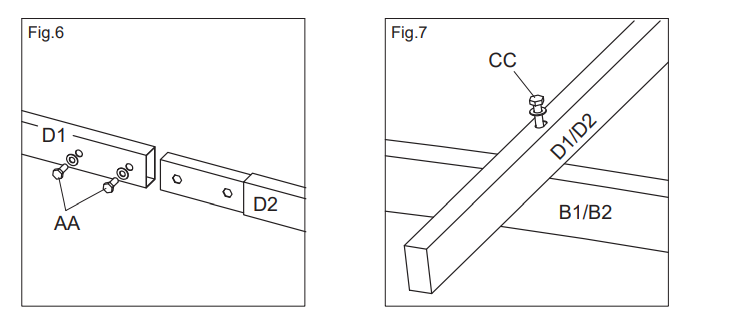
Fig.6: Using Bolt (AA) to connect Roof Tubes (D1 &D2).
Fig.7: Using Bolt (CC) to connect Roof Tube Curved (B1) and Roof Tubes (D1) / Roof Tube
Curved (B2) and Roof Tubes (D2) / Roof Tube Curved (B1) and Roof Tubes (D2) / Roof Tube
Curved (B2) and Roof Tubes (D1).
Step4:
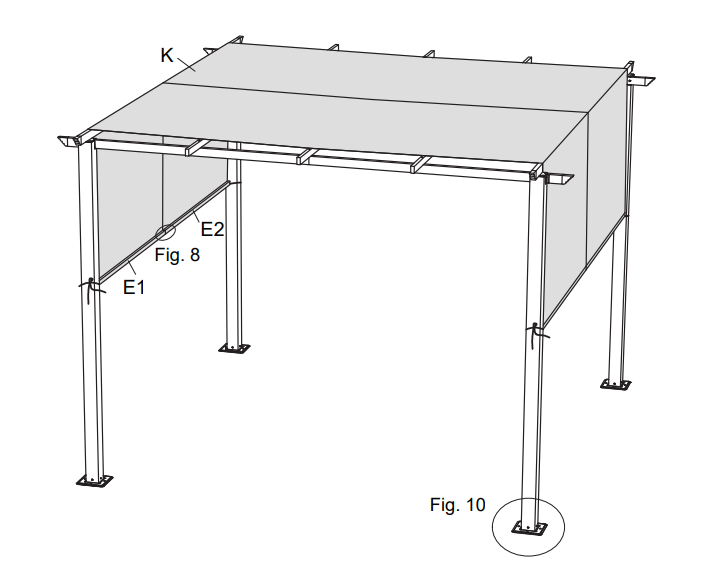
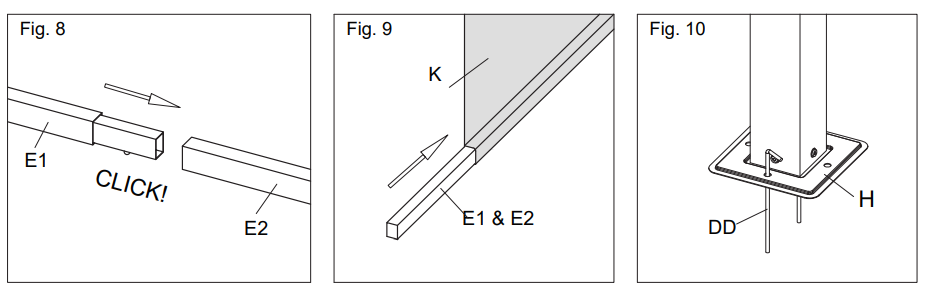
Fig.8: Insert Weight Bar (E1) to Weight Bar (E2) till you will see the push pin out from the tube. Fig.9: Pass the Shade Fabric K through the Roof Tube (D1/D2) in turn as above diagram. Make sure Cross Beam (C1/C2) on the edge support the Shade Fabric underneath. Insert the Pulling Rod (E1/E2) to Shade Fabric. After assembled, please pull the Shade Fabric, make sure it runs smoothly. Fig.10: Move up the Base Plate Cover (J), insert Anchor (DD) to Base Plate (H). Tie the fabric rope on the post (A1/A2).