3-Seat Outdoor Patio Swing Chair Assembly Manual
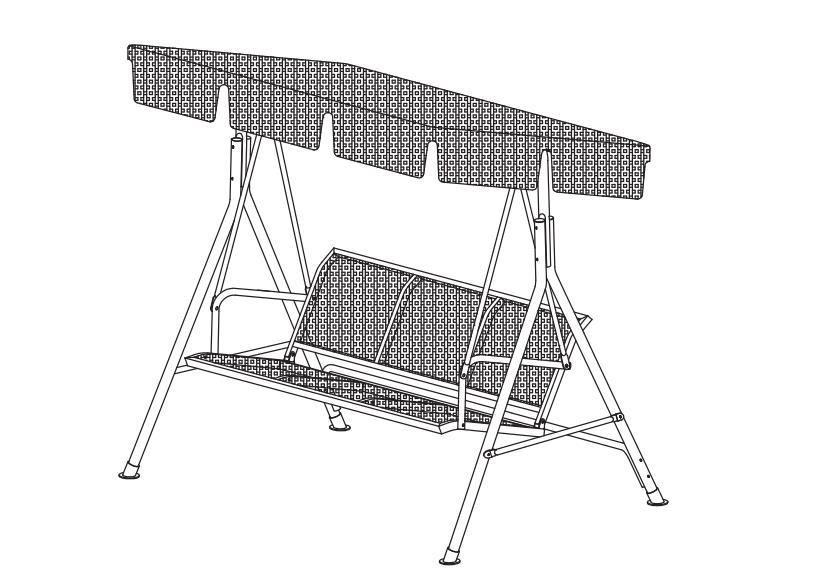
Outdoor porch swing is your best bet for light and durable comfort throughout long summer days and warm winter evenings.
YMOUTDOOR manufacturer hammock glider compliments the look of any patio or porch with its crisp, understated color and contemporary
design, perfect for encouraging languid conversations with cool drinks in hand with Factory Price.
Whether you're looking for a fashionable piece to complete your garden, yard, deck, or pool, 3-Seat Outdoor Patio Porch Swing is a superior
swing that looks at home in any environment.
With room for three to share, it also maximizes your outdoor space and is certain to be a favorite with your family.
Please read the installation guide carefully and follow the installation steps strictly.
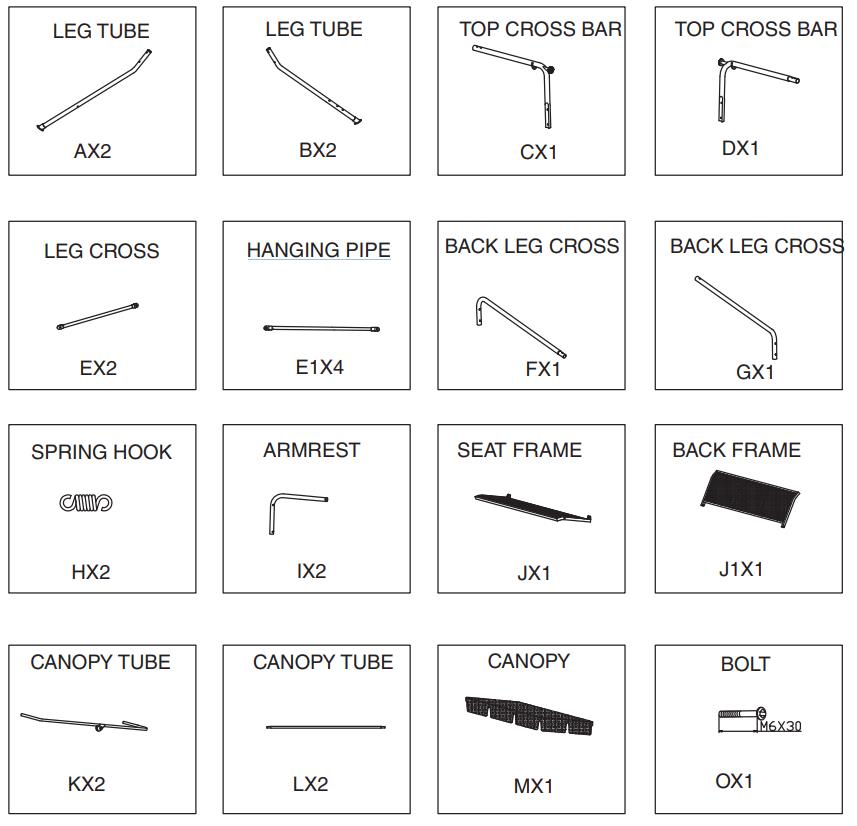
Part list
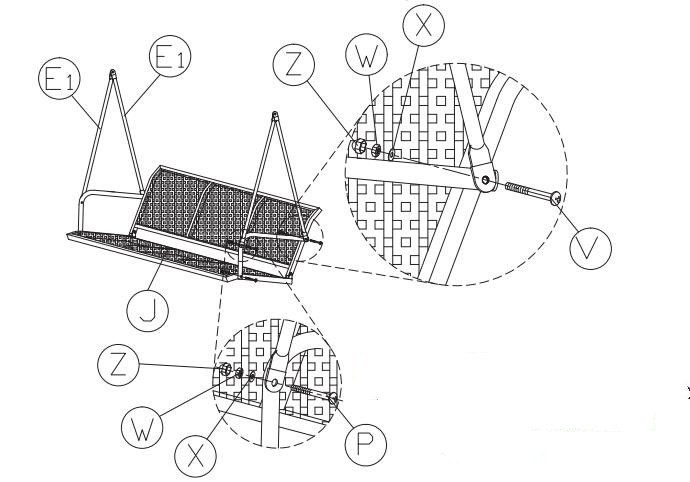
Installation Steps
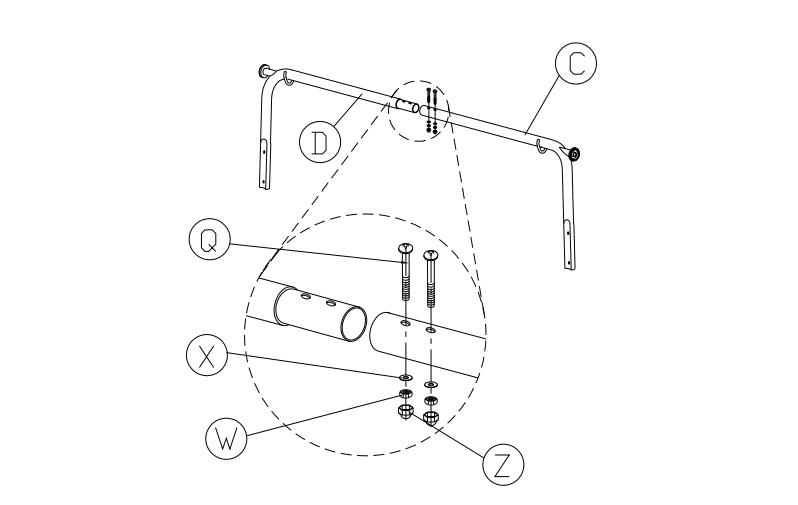
STEP -1
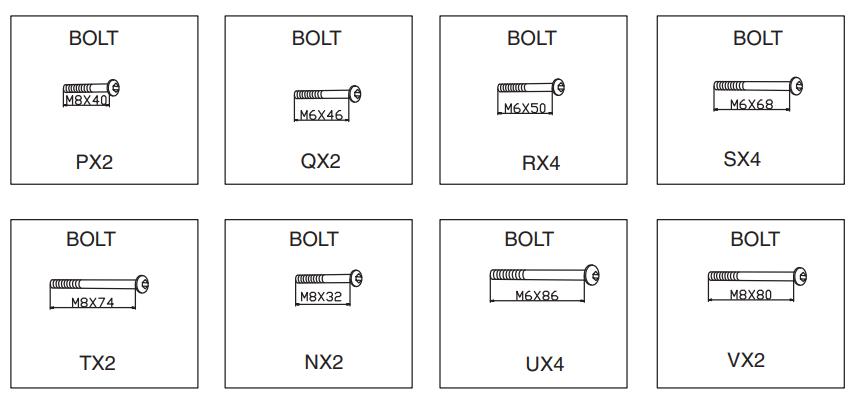
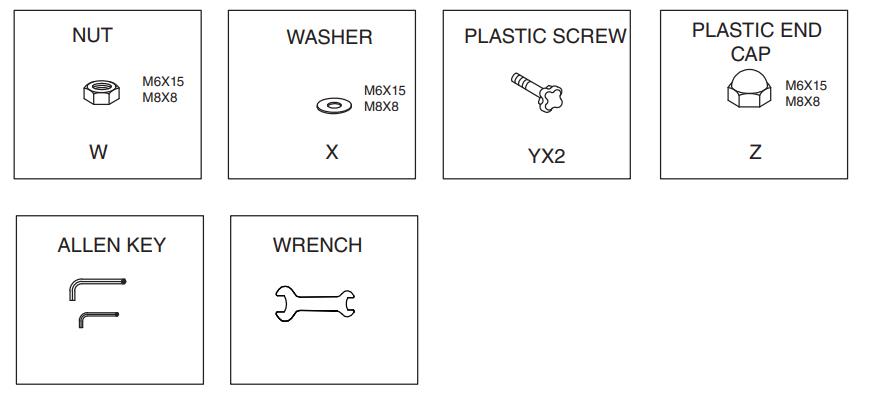
Connect part D and part C to build the beam using bolt Q washer X,nut W and plastic end-cap Z as shown in diagram.
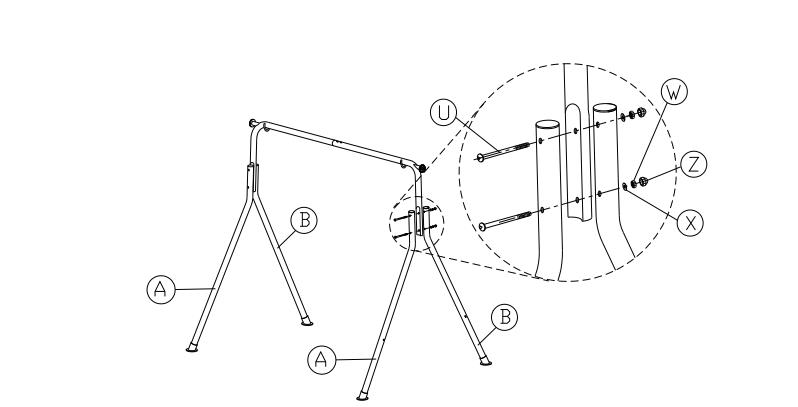
STEP -2
Connect part A and part B with beam using bolt U washer X,nut W and plastic end-cap Z as shown in diagram.
Attention:Both part A should be the sime side,and both part B should
be in the other side.
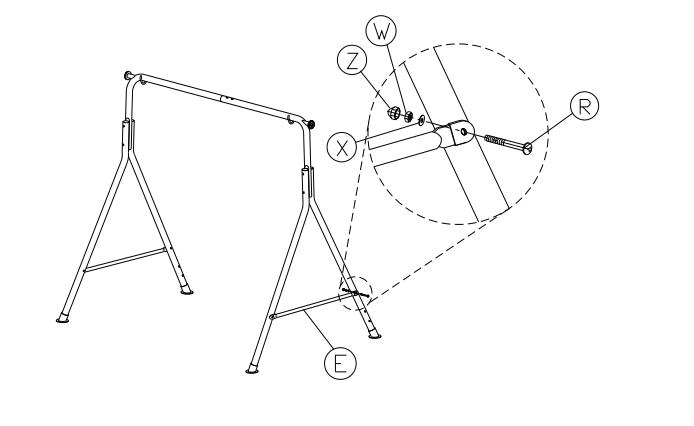
STEP -3
Connect part E and legs (part A&B) using bolt R washer X,nut W and plastic end-cap Z as shown in diagram.
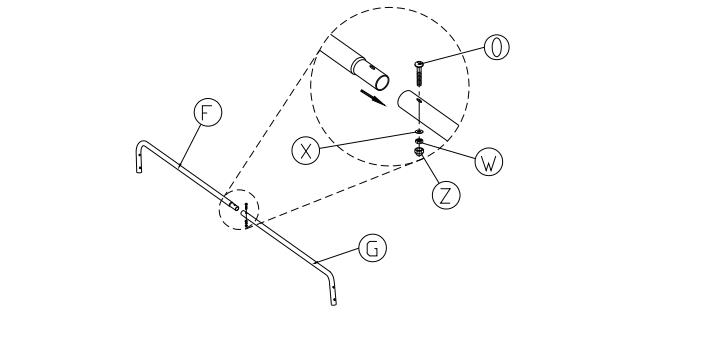
STEP -4
Connect part G and part F to build a connection tube for the rear foot using bolt O,washer X,nut W and plastic end-cap Z as shown in diagram.
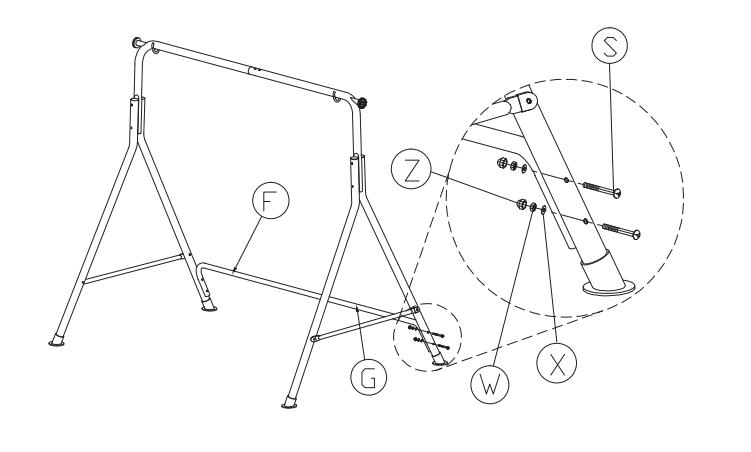
STEP -5
Connect the rear foot tube with part B using bolt S washer X,nut W and plastic end-cap Z as shown in diagram.
STEP -6
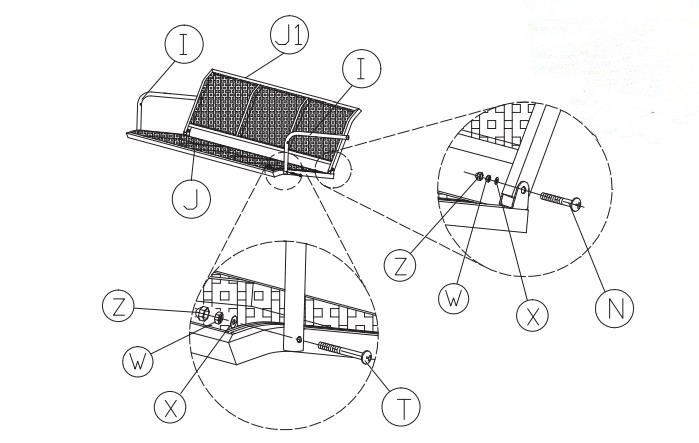
Set up seat&back together.
1.Connect part J1 and part J together using bolt N,washer X,nut W and plastic end-cap Z as shown in diagram.
2.Connect part I and part J using bolt T
washer X,nut W and plasticend-cap Z
as shown in diagram.
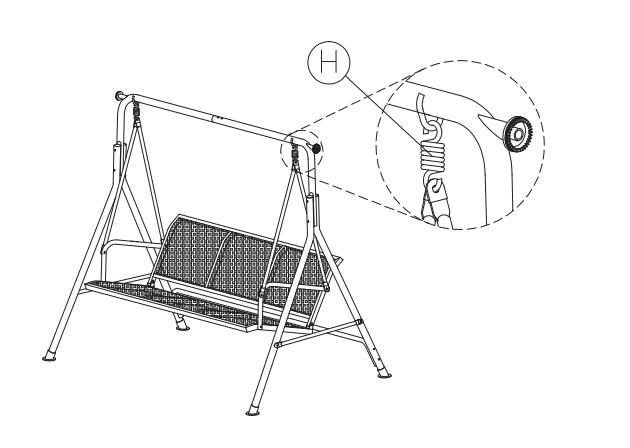
STEP -8
Use part H to hook the seat to the frame.
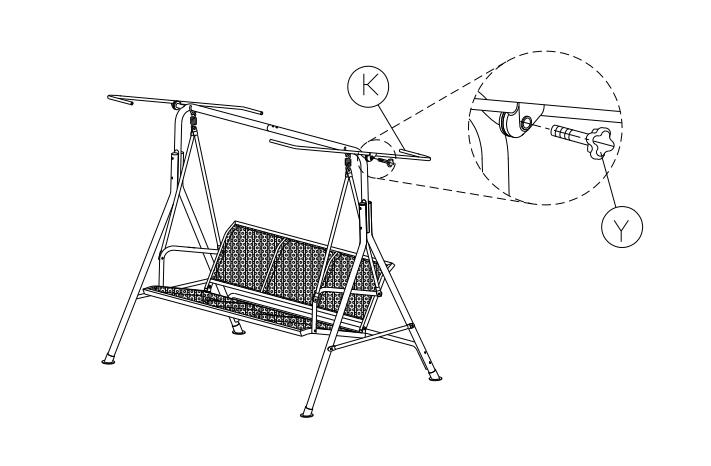
STEP -9
Affix part K to beam using screw Y.
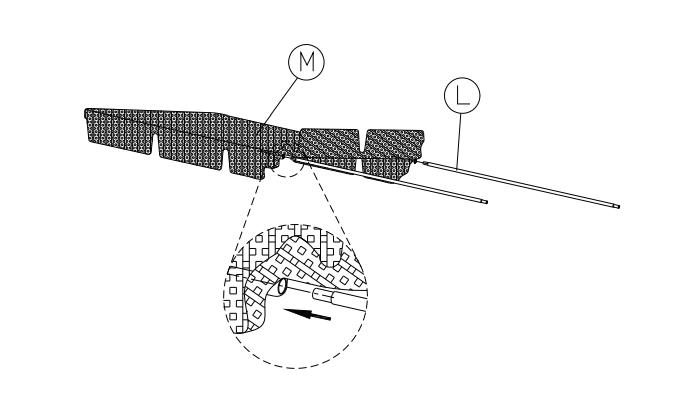
STEP -10
Insert part L to canopy.
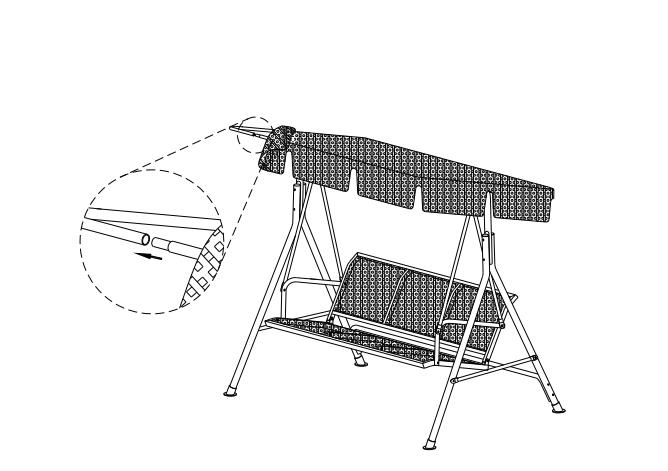
STEP -11
Connect Part L and Part K to support canopy.
In the end,check all screws are fixed tightly before using.