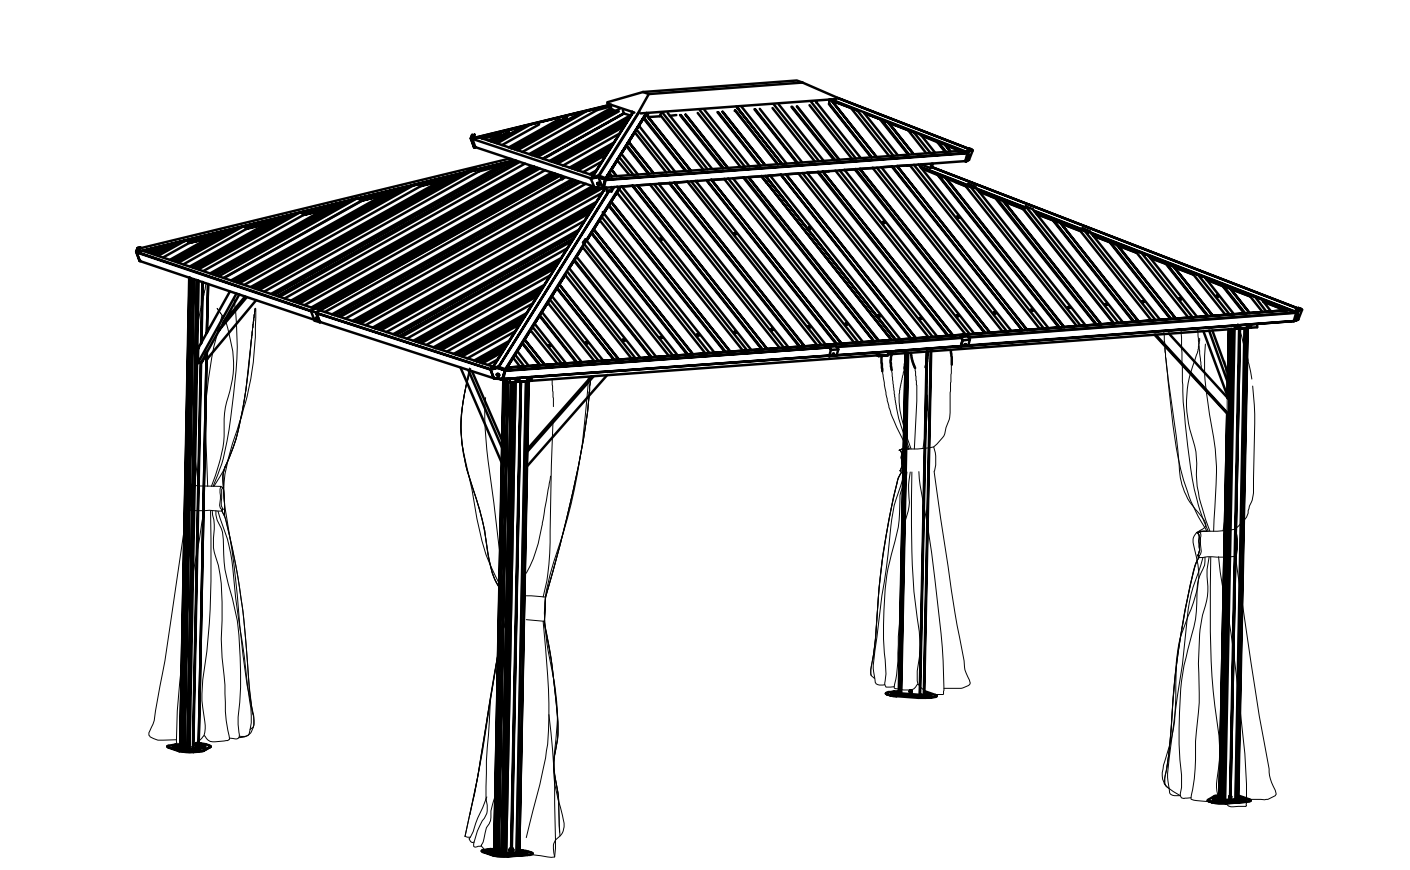
YMOUTDOOR's high quality hard top gazebo is a great choice!
The gazebo consists of a powder-coated galvanized steel roof and an aluminum frame for sturdiness and durability.
With a high quality powder coated frame, the deck is weather, rust and corrosion resistant, ensuring a longer life and
easier maintenance.
Keep it outside for all-weather use for both comfort and safety. Made of heavy-duty galvanized steel and aluminum,
the gazebo is very strong and safe for outdoor use.
The larger size of the more indulgent patio is perfect for larger patio and larger patio furniture sets.
Two extra layers of components make for more versatile use. Keeps pesky bugs out, provides more shade if needed,
and feels like there is more privacy.
Mosquito nets and side walls are essential and will definitely enhance the whole experience.
The ventilated roof is designed for optimal airflow and comfort.
Please read the installation guide carefully and follow the installation steps carefully for installation.
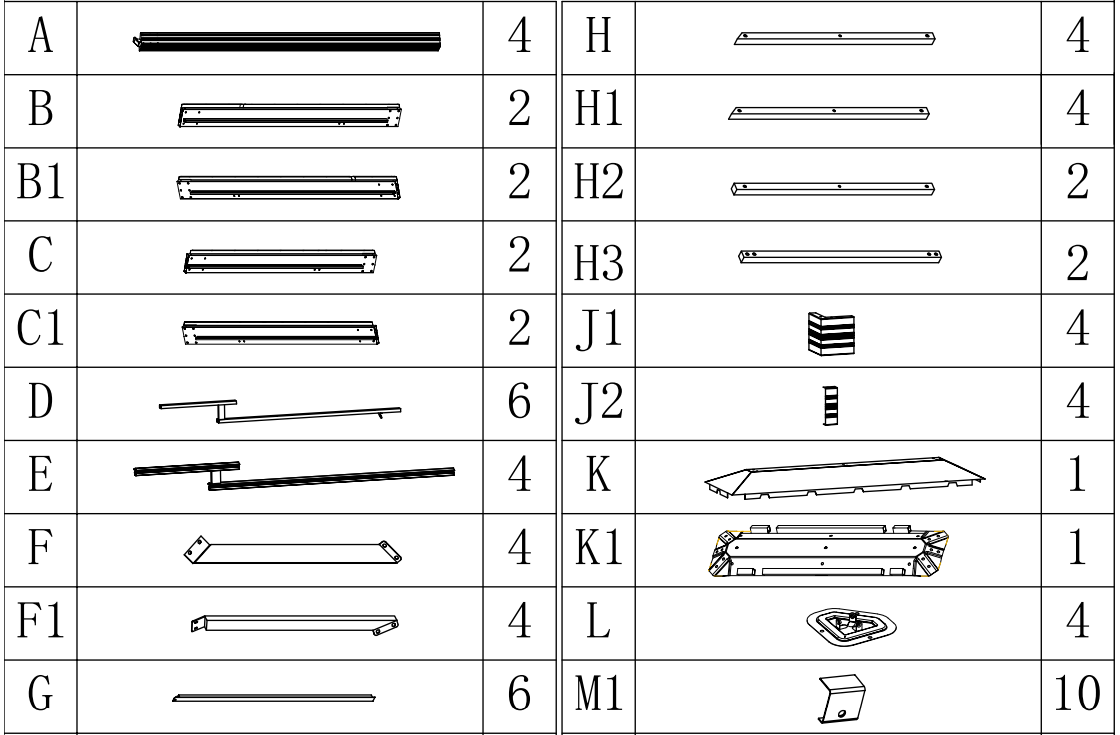
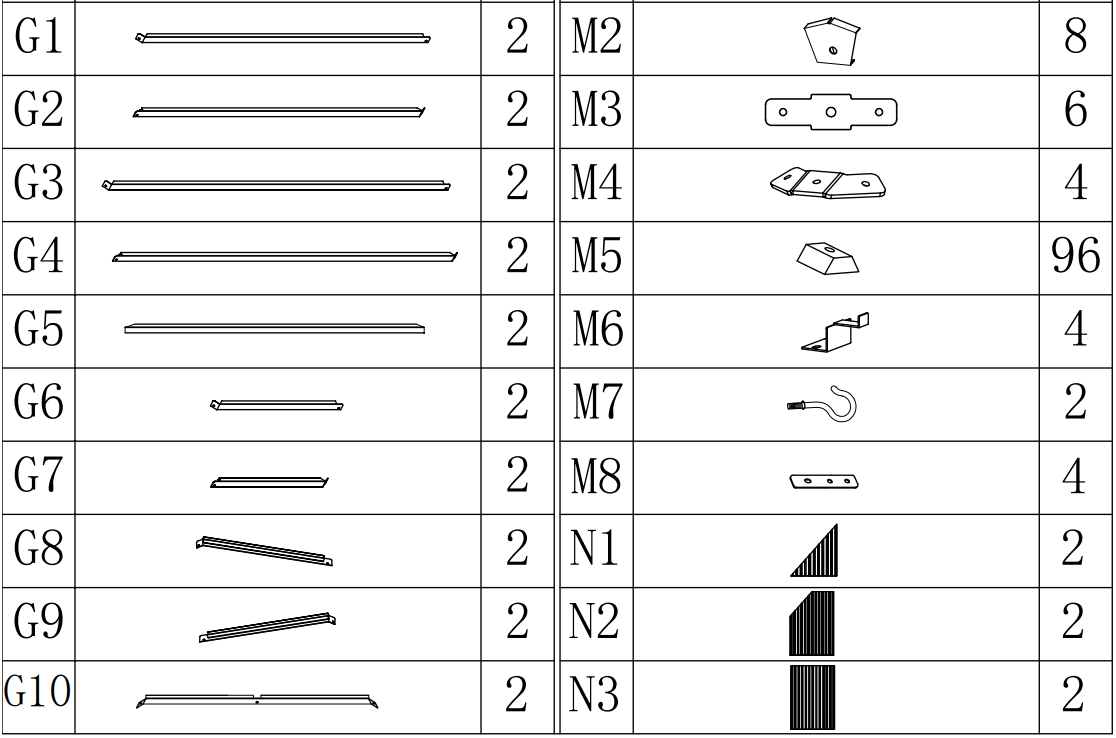

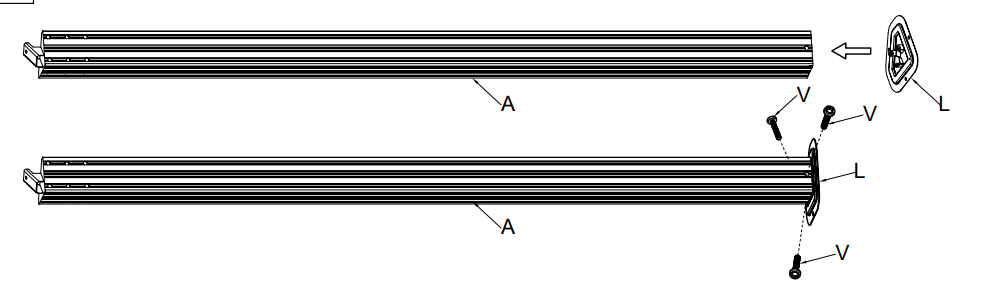
Step 1:Attach foot base(part L) to the (part a)
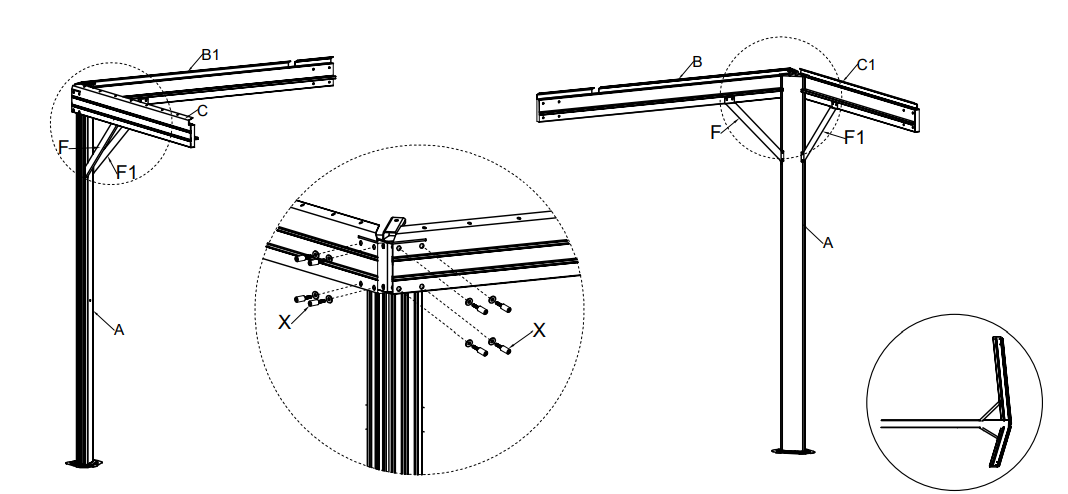
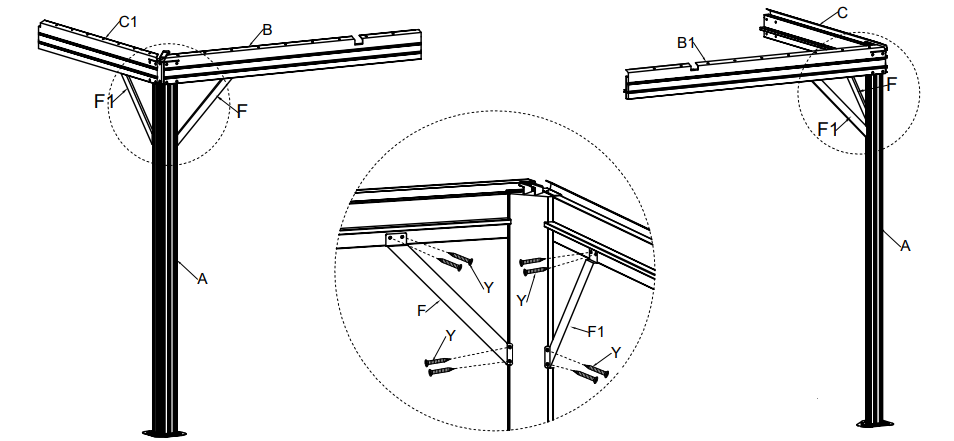
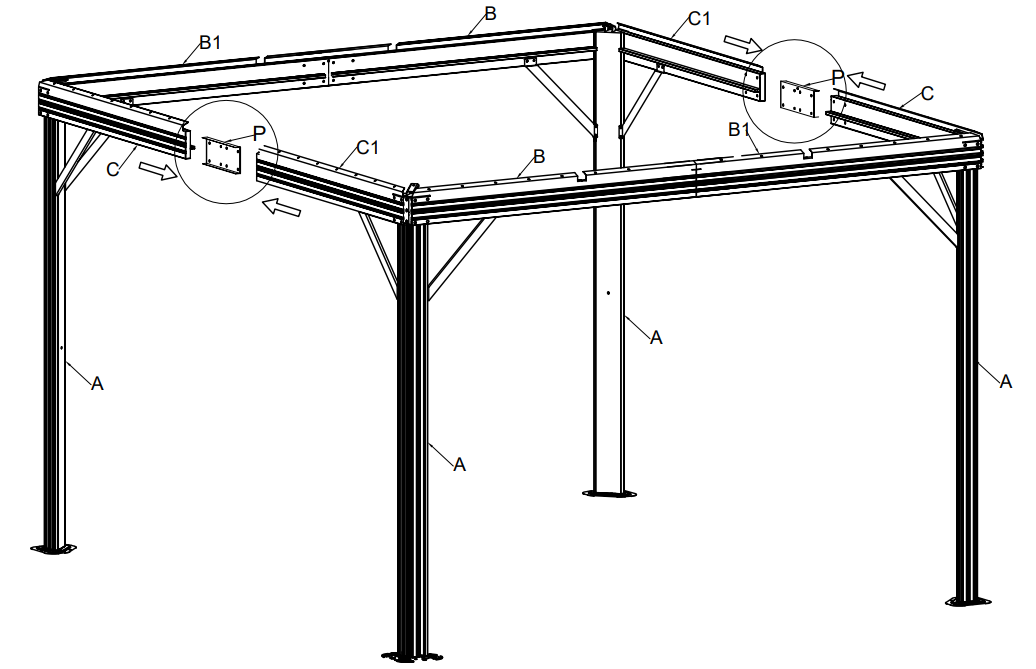
STEP 2: Attach Crossbeams 1 (Part B) and Crossbeams 4 (Part C1) to Pillars (Part A) .
Attach Support Brackets ( Part F and F1) to Crossbeam and Pillar.
Attach Crossbeams 2 Part B1) and Crossbeams 3 (Part C) to Pillars (Part A).
Attach Support Brackets (Parts F and F1) to Cross Beam and Pillar
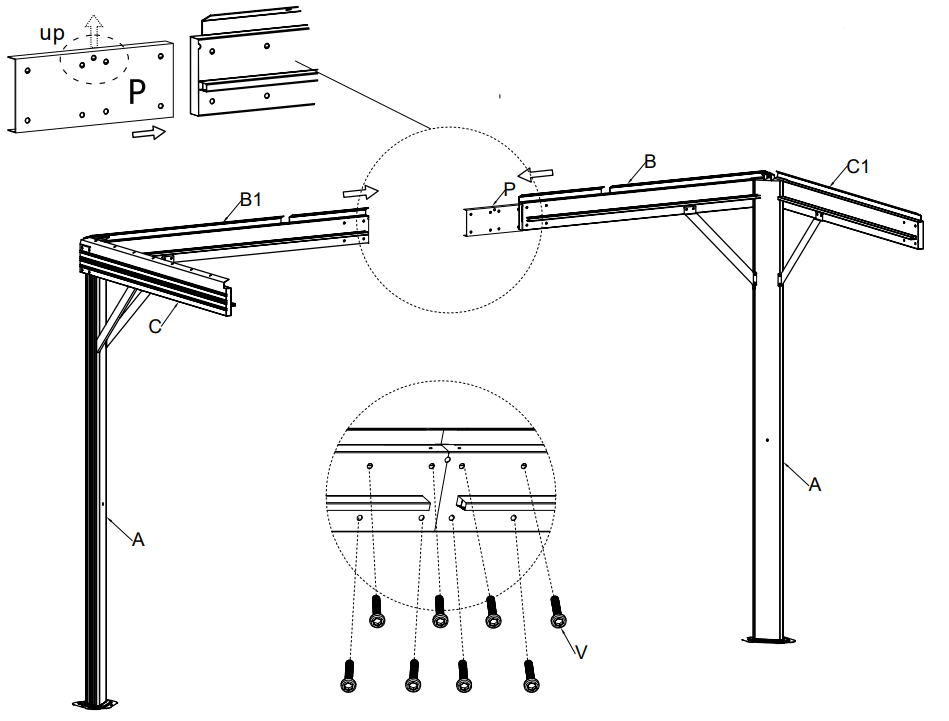
STEP 3:Connect the Ionger Crossbeams B and B1 using Crossbeam Connector (Part P)
Note: After sliding the Crossbeam Connector (Part P) into a crossbeam you should start one bolt to hold the Crossbeam Connector in place.
STEP 4: Stand both sides Upright and Connect Crossbeams B and crossbeams B1 using the Crossbeam Connectors (Part P)
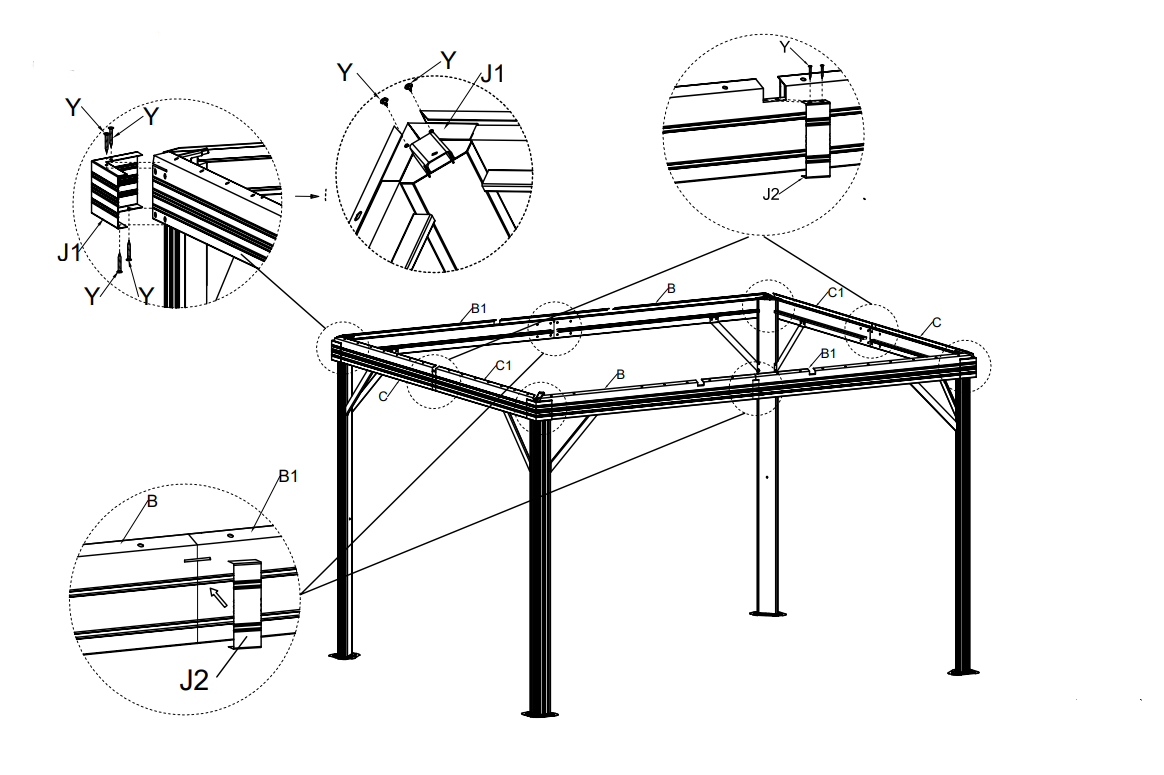
STEP 5: Attach the Corner Protectors (Part J1) and the Rib Supports (Part J2) Just twist the top two screws of (Part J2)
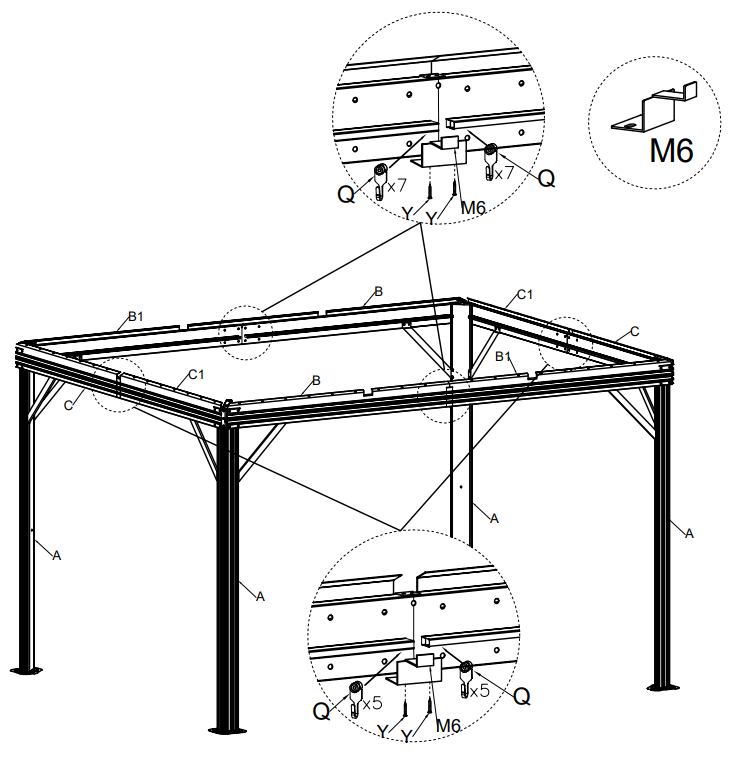
STEP 6: Slide 7 Netting Hooks (Part Q) into Long Crossbeams (Parts B and B1).
With the sections laying on their side, Slide 5 Netting Hooks (Part Q) into Short Crossbeams (Parts C and C1).
Then Attach (Part M6) Note: There are two tracks. You can choose either track to install Part Q
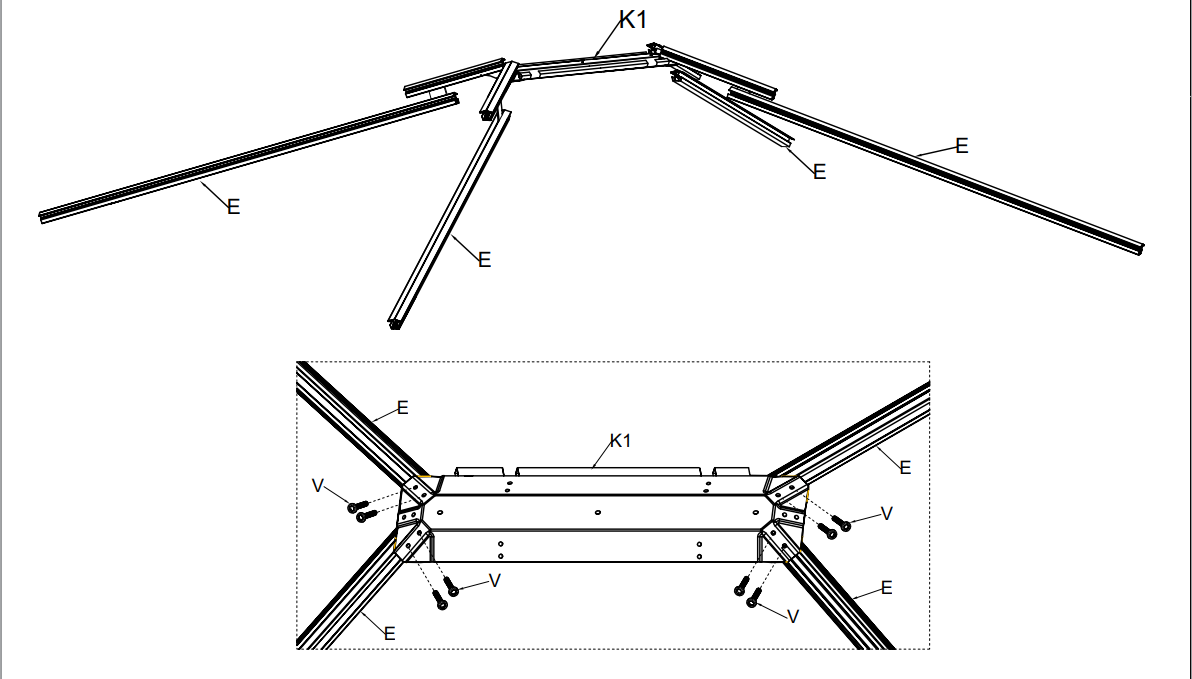
STEP 7: Assemble the Roof Frame by Attaching the Roof Ribs Long (Part E) to the Roof Top Brace (Part K1).
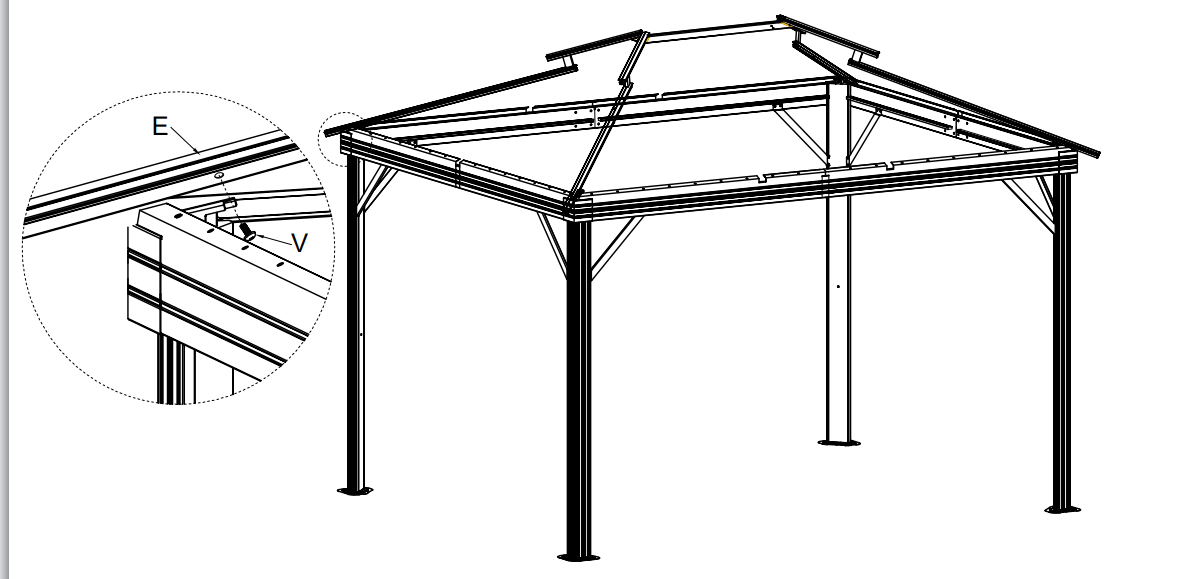
STEP 8: Lift the Partially assembled Roof on to the assembled Frame and attach.
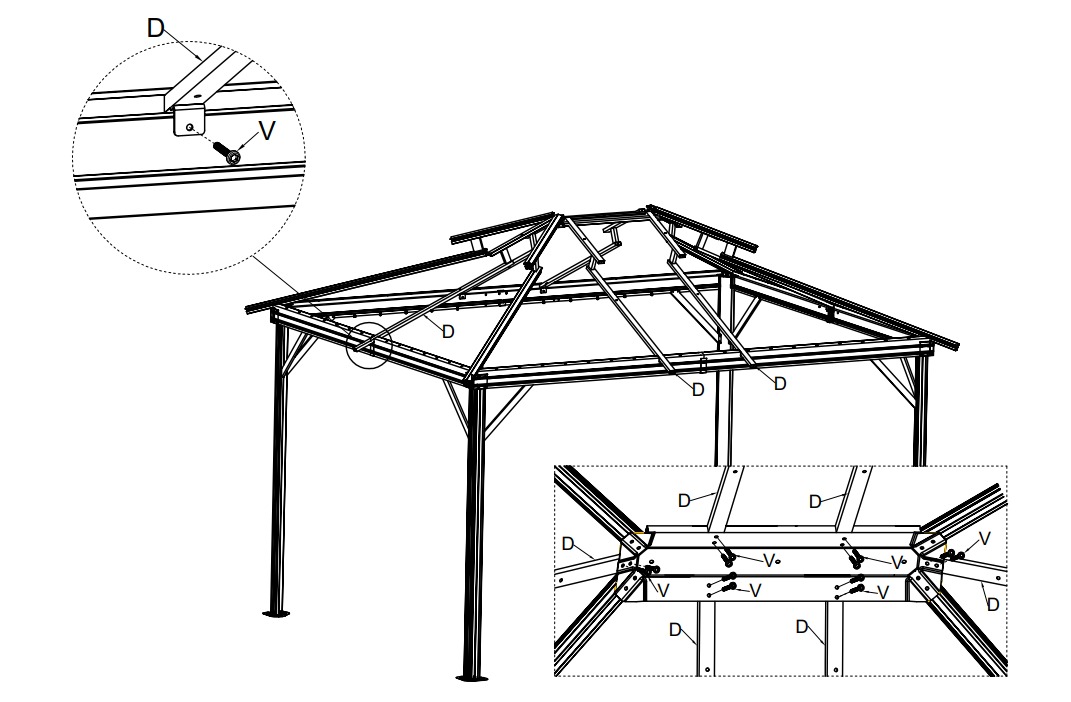
STEP 9: Attach the Roof Ribs Short (Part D) to the Roof Top Brace (Part K1). Attached the Roof Ribs Short (Part D) to the assembled frame.
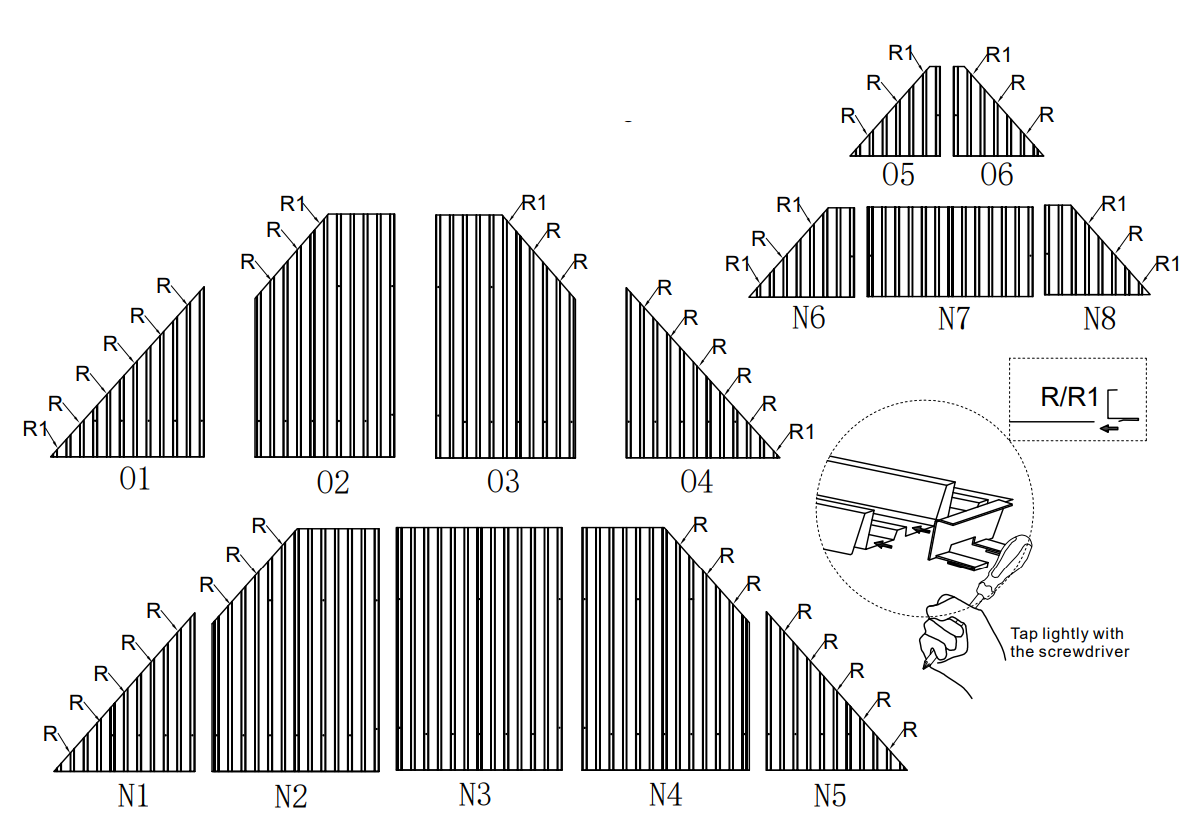
STEP 10: Attach the Clips (Part R1) and Clips (Part R) as shown in the diagram.
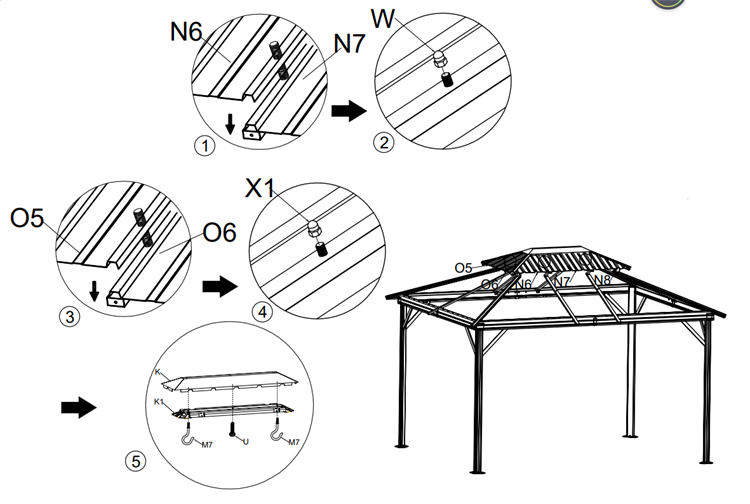
STEP 11:Install the Roof Plates (Part N6 N7 N8) on the Long Sides of the Gazebo.
Install the Roof Plates (Part O5 O6) on the Short Sides of the Gazebo.
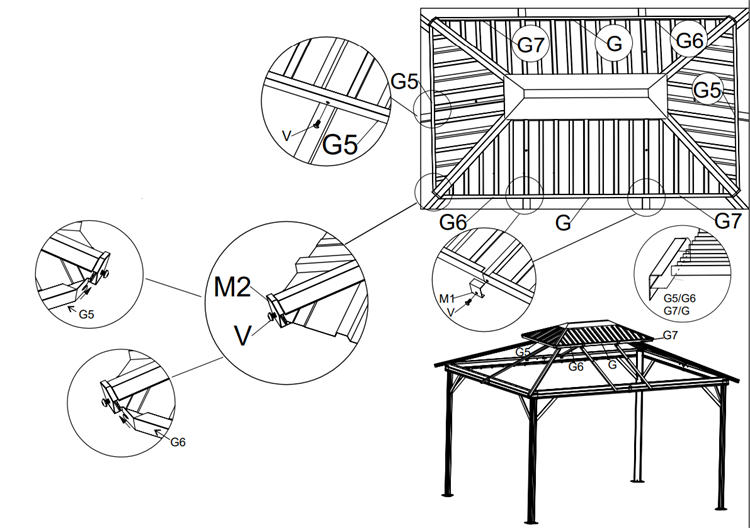
STEP 12:Tighten the screw (part U) halfwy,then install(Part G G5 G6 G7), and finally tighten the (Part U)
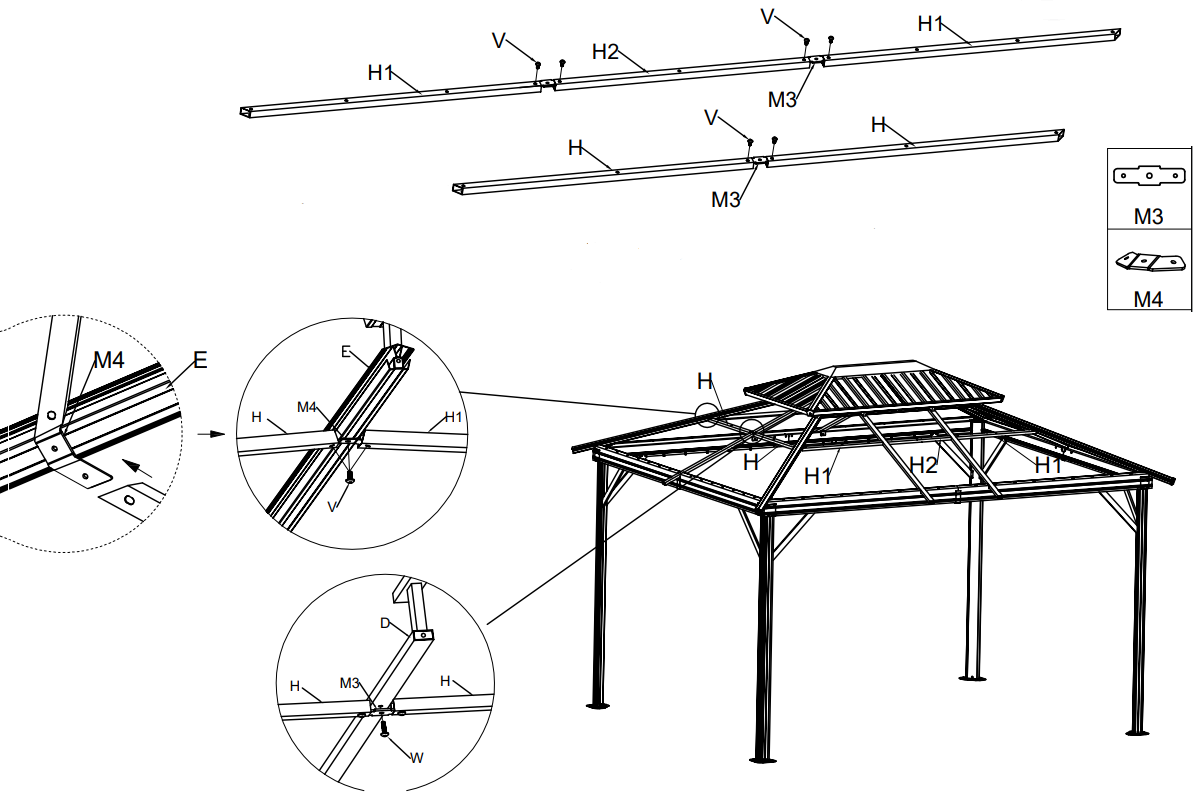
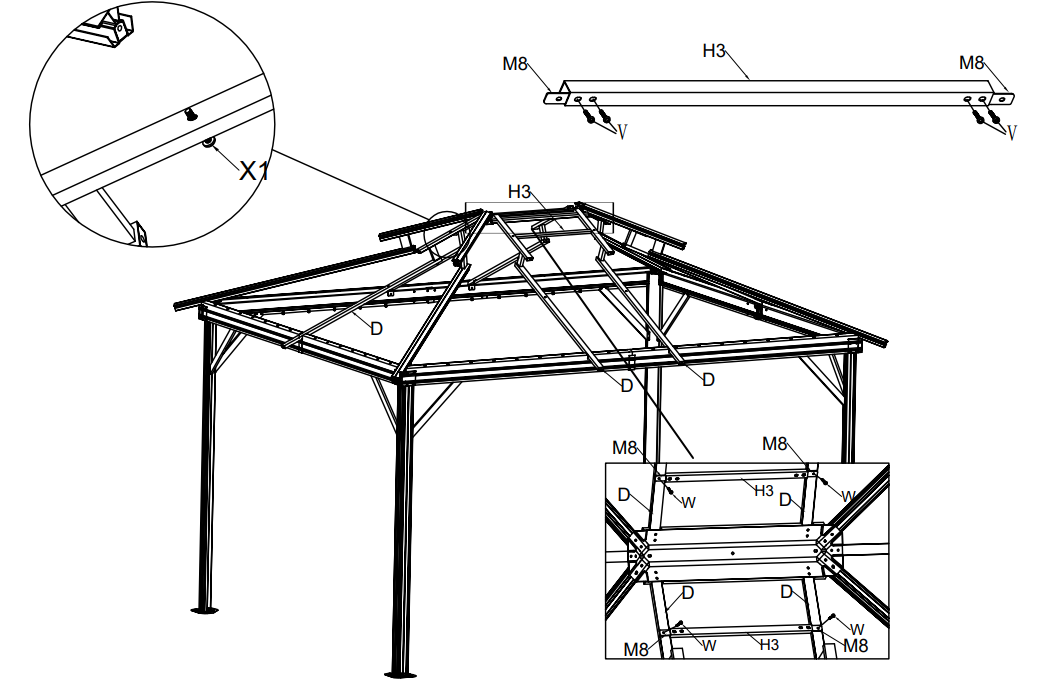
STEP 13: Attach the Roof Supports (Part H H1 H2) to the roof frame using Connectors 1 (Part M3) and Connectors 2 (Part M4) as shown in the diagram.
Don't tighten all the screws, just hold the(Part H and Part H1), until all of them are fixed.
Please note that Parts M3 are installed on Parts D, and Parts M4 are on Parts E.
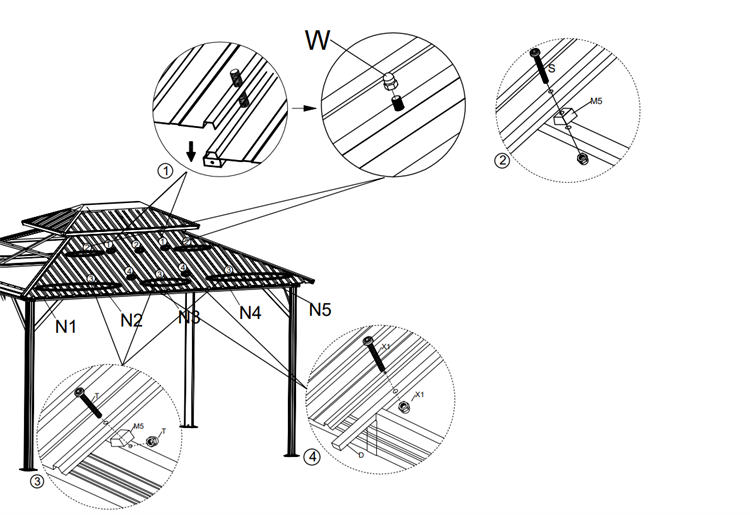
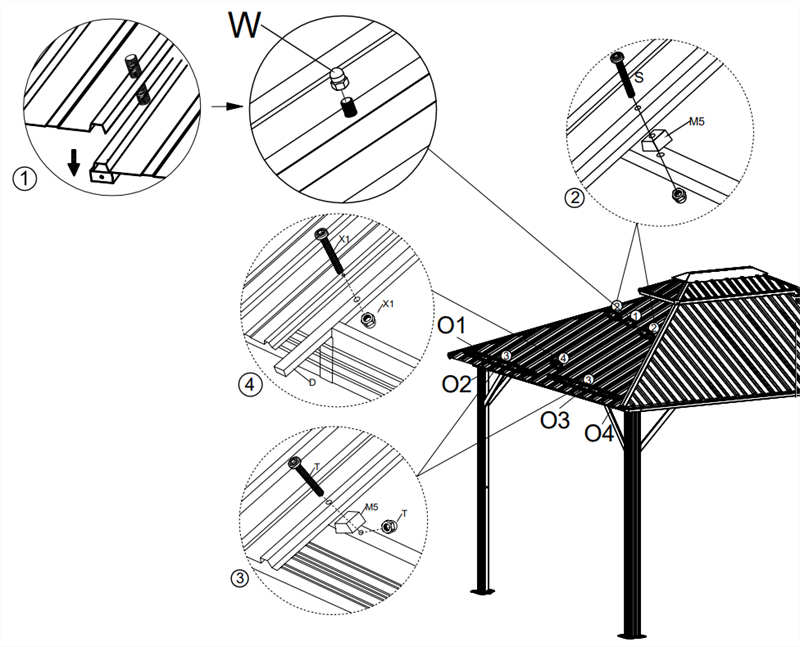
STEP 14:Part N1 N2 N3 N4 N5 for the Long Sides of the Gazebo, Part O1 O2 O3 O4 for the short Sides of the Gazebo.
Install the Roof Plates on the Long Sides of the Gazebo.
Start by sliding Roof Plate 1 (Part N2 N3 N4) into position.
Then N1and N4. The same for the other three sides.
STEP 15
STEP 16
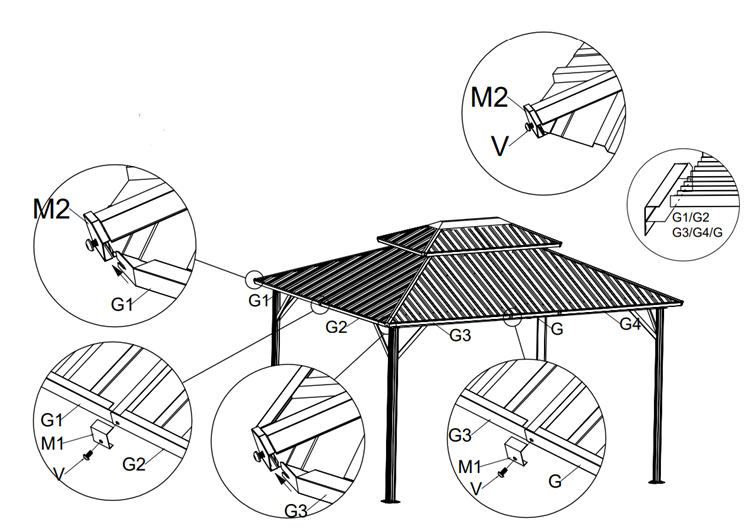
Note: First fix 4 (Part M2) with V, but do not screw too tight, then install (Part G G1 G2 G3 and G4 )as shown in the diagram.
You'd better from left to right. Attach the Center Rib Braces (PartM1) as shown in the diagram.
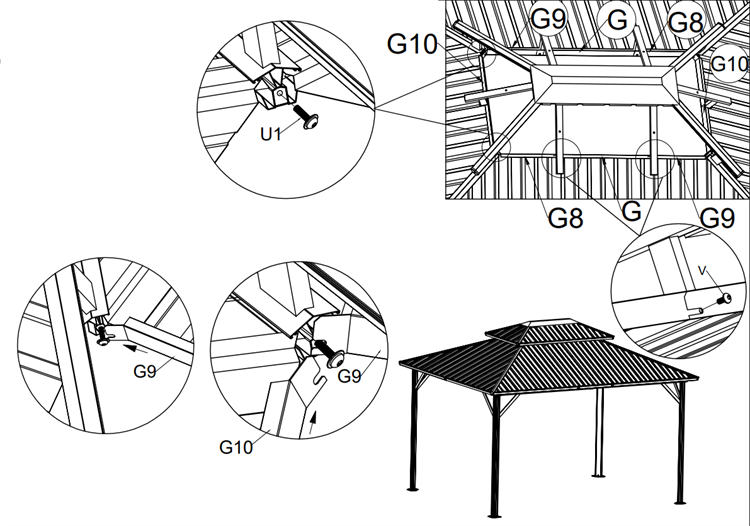
STEP 17:Fix 4 U1 with V (just screw in a little), then install G G8 G9 and G10 from left to right as shown
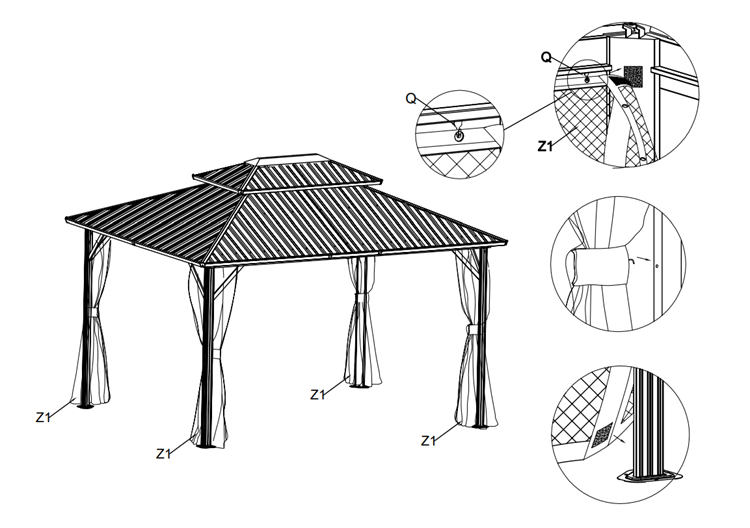
STEP 18: Install the Mosquito Netting as Shown in the iagram.