Cast Aluminum 3 Piece Bistro Dining Set ----Table Installation Guide
Caution : You must read this before you proceed.
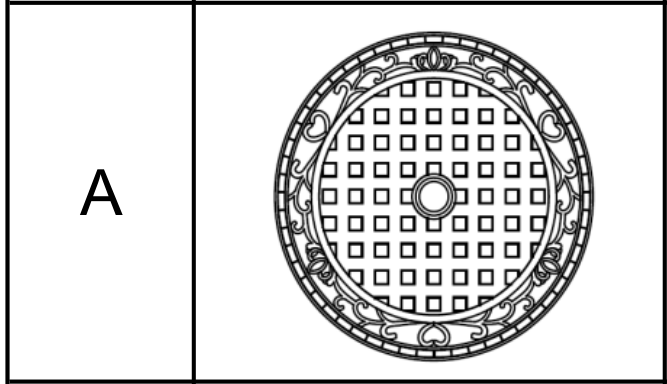
Table Top x1
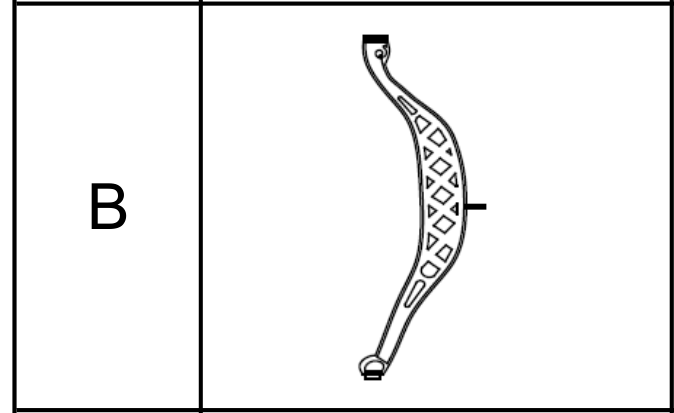
Leg(with pre-attached leveller)x3

Central Support Ring x1
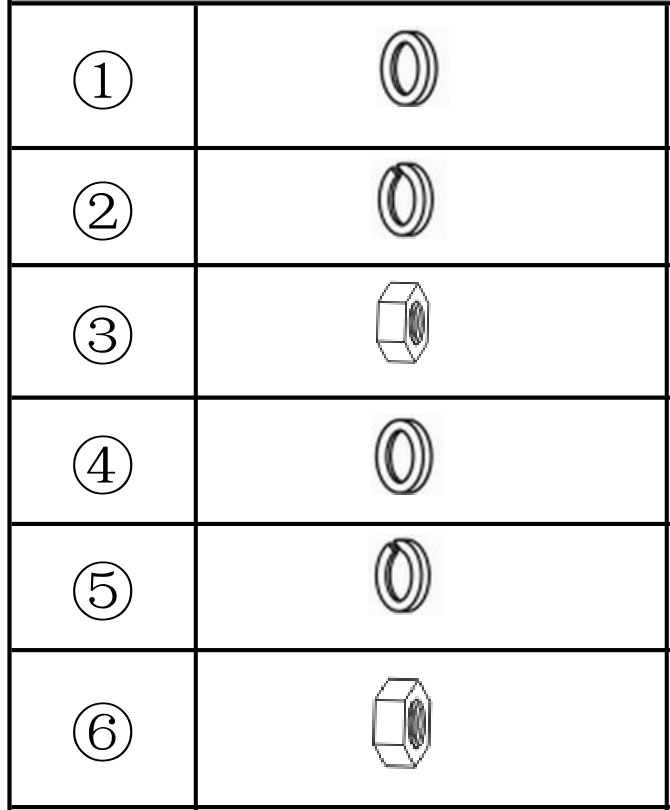
Washer (6mm) x7
Spring Washer (6mm) x7
Nut (6mm) x7
Washer (8mm) x7
Spring Washer (8mm) x7
Nut (8mm) x7
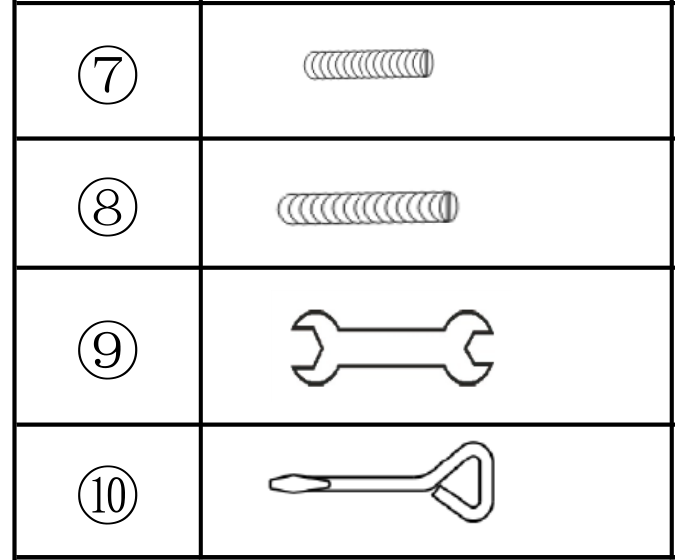
Bolt (6*32mm) x7
Bolt (8*32mm) x7
Spanner x1
Screwdriver x1
Before Beginning Assembly:
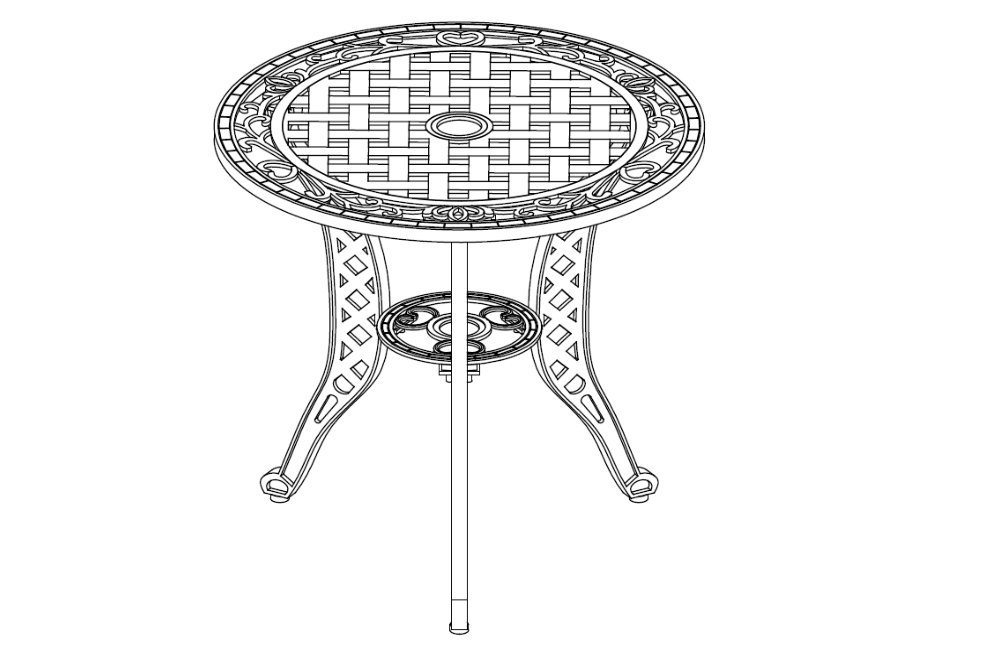
Assembly Step
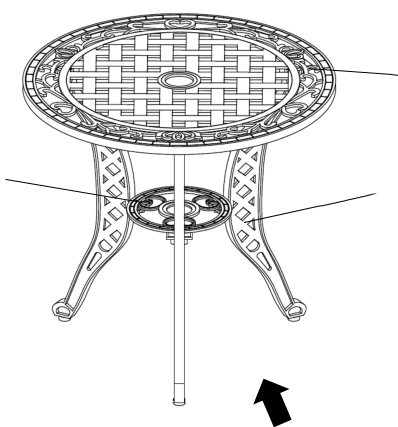
Table Top(A)
Leg(with pre-attached
leveller)(B)
Central
Support Ring(C)
FRONT FACING
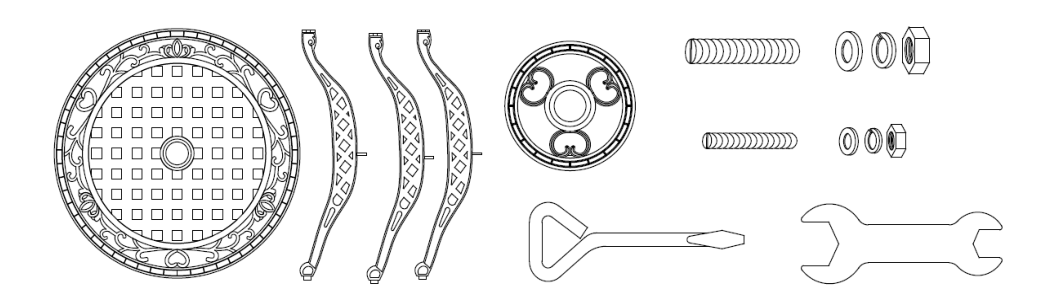
This Table has multiple parts and may require up to 30 minutes to assemble. To give
you an overview of the Table parts, the above picture is to help you put the various
parts into perspective. Please read through the instructions below to familiarise
yourself with the parts and steps before assembly.
Step 1
Unpack and place all parts on a clean, non-marring surface.
Step 2
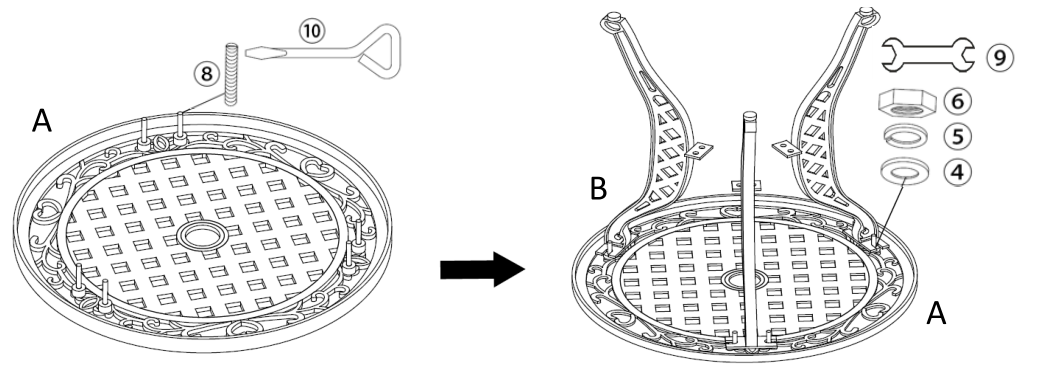
Place Table Top(A) facedown onto a clean, non-marring surface.
Fix the Bolts(⑧) to the Table Top(A) with Screwdriver(⑩).
Tighten the Bolts fully.
Attach Legs(B) to Table Top(A) using Washers(④), Spring Washers(⑤), and
Nuts(⑥) with Spanner(⑨).
Do not fully tighten the Nuts.
Step 3
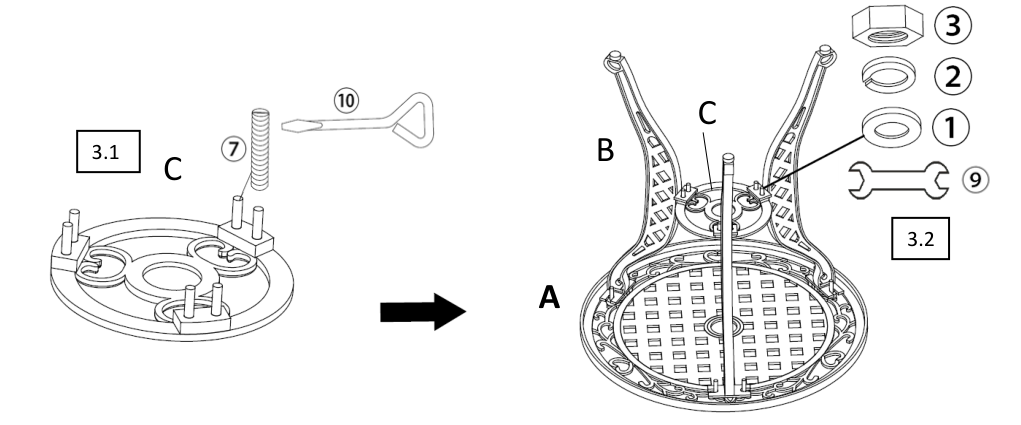
3.1) Fix Bolts(⑦) to Central Support Ring(C) with Screwdriver(⑩).
Tighten Bolts fully.
3.2) Attach Central Support Ring(C) to Legs(B) using Washers(①), Spring
Washers(②), and Nuts(③) with Spanner(⑨).
Tighten all Nuts at all joints in a sequential manner.
Step 4
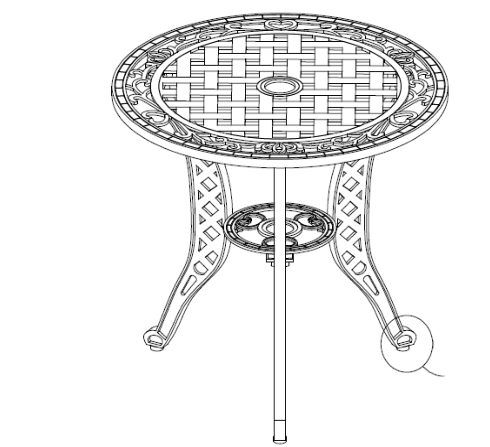
Stand the Table up.
Adjust the Legs pre-installed Levellers until the Table is level with the ground.
Your Table is now ready for use.
This Table can only be used on a flat, level surface.